Thursday, November 29, 2012

Diversions (Updated)

Interior sanding and epoxy work continues. Temperatures have been cooperating enough - aided by the plastic weather coverings tacked up on the windows - to allow epoxy work.

The band-saw is back in operation with a new capacitor. I'm sure it is just wishful thinking, but the motor seems to be working better than ever. Of course, cleaning the motor and blowing out a LOT of sawdust probably helped.

Getting the band-saw working meant I had to test it… but just cutting scraps of wood didn't make sense, might as well cut something for Gardens. Checking the plans, I decided to work on the mast steps (both main and mizzen) and the boomkin mount. So, after figuring out what I needed and checking my wood supply, I cut out the pieces for the boomkin mount. (Photo in the morning as the camera is not available tonight.)


The boomkin mount dry-fitted. The base was cut from a block of laminated Douglas fir using the band-saw and planer to mill it to size. A bench-top sander worked to bevel the top corners. A scroll saw was used to cut the 3/8" meranti ply side pieces. The pin holes are over-sized. They will be filled with epoxy and re-drilled for the pin attaching the boomkin in place. More sanding, epoxy and finish work to do on this component. Working on these small bits is a nice diversion from the monotony of sanding.

Sunday, November 25, 2012

A View From Astern

Plenty of sanding and epoxy work (and not much else) going on…

Actually, there is more going on - it just isn't visible. I am writing out lists of what needs to be done (or what I think needs to be done) this winter. Big-picture items include the bunk flats, the cockpit seats and the decking. Heck, that's it! That's all I have to do before turning the boat to fair and paint the bottom… Of course, there is a lot of detail and fiddly work to be done before those big-picture items are completed. Then, too, I have my list of tasks to do inside when winter really sets in. Pretty soon, though, I'll need to figure out how to support the hull while I bumble around working on the interior - I don't want to capsize Gardens in the shop!

The view from astern:


…which is an interesting perspective. I like it. I think I'll use this angle (among others) as the interior work progresses.

Friday, November 23, 2012

Tingles... and Sanding

Thanksgiving Day was absolutely beautiful with sunshiny skies and temperatures in the low 60s. It was a perfect day to work on Gardens and It was also a perfect day for visiting with family and friends. Family and friends won out over boat work.

Last night the weather changed - wind, rain, lightning and thunder in the evening followed by dropping temperatures and more wind in the early morning hours. Snow flurries have been blowing around off and on all day. Despite the dismal conditions outside, I was able to get some work done on Gardens.

The nine remaining 'tingles' (reinforcing/backing strips aka butt straps spanning the joins between pieces of planking) were cut and installed today. The tingles are not difficult to cut, fit and install so this really isn't much to report - just another of the small but necessary steps to take toward completion.

Sanding continues...

Wednesday, November 21, 2012

Thoughts and an Idea

It is the night before Thanksgiving, pies are baked, turkey is thawed, the house is clean and company won't arrive until tomorrow.

No new progress on Gardens to report - sanding is sanding and not very exciting at that - but I have been thinking about upcoming steps and stages in the building process. One of those steps is to install the bottom of the anchor well. Fine, I will do that because I suspect that piece of plywood adds to the strength of the bow. But I have begun to wonder just how functional that anchor well is for storing AND using ground tackle.

The anchor well is forward of the mast and well forward of the cockpit. It seems - and I haven't really tried that reach yet or even asked for comments based on experience - the anchor well is too far out of reach to be practical and, perhaps, a bit small to boot.

So, I am contemplating foregoing the anchor well - and its necessary deck cut-out - for a cockpit anchor storage/deployment//retrieval set-up. This will, for the time being, eliminate the deck cut-out and, as a result, simplify the building process. Installing the anchor well bottom now means I can always modify things if a future need arises.

Probably won't get much boat work done tomorrow, but Friday should be a good day in the shop.

Happy Thanksgiving!

Monday, November 19, 2012

Work Continues… and a Note re the New Shop Accessory

Sanding, in preparation for epoxy coating and painting, has begun. The stem/spine and all the frames were coated with epoxy when they were built but none of the planking (other than the glued portions) has been coated as yet.

Beginning at the forward end: sanding all surfaces, vacuuming; and covering with two coats of epoxy. Once that is done, I will measure, mark, cut and fit the bottom piece for the anchor well. The interior of the bow section will then be painted before the anchor well deck is installed. That all may happen this week - but with the Thanksgiving holiday upon us, well, let's just see how things progress.

A note regarding that new shop accessory I commented on earlier this month: It works well enough keeping large bits and pieces from getting to the main shop-vac but it does not keep the shop-vac filter from clogging with fine dust. This is so because there is no "cyclone" effect created by the Woodstock fitting. In fact, a close look of the item would have suggested this outcome: The pick-up hose feeding into the bucket and the vacuum hose from the shop-vac are nearly opposite one another. The fine dust and sawdust is sucked right into the shop-vac. Perhaps a baffle of some sort or, perhaps a screen over the end of the hose to the shop-vac, would improve the performance. Hmmm… perhaps a baffle made of screening would do the trick? At any rate, the Woodstock item does seem to improve the shop-vac's performance.

Good news: Upon further review, the band-saw does NOT need a new motor. A new start capacitor should have the saw back in operating condition.

Saturday, November 17, 2012

Preparing for the Next Stage

Yesterday and today have been quieter and less frantic than the last few days of the planking. I didn't do much actual boat work but I did things that will facilitate the next stages of this build:
  • Reviewed the plans and drawings to make sure I know what's next
  • Checked materials on hand to make sure I have what I need before I need it!
  • Cleaned up the shop - lots of dust (from grinding the bevels for the planking) everywhere
  • Began winterizing the shop - not so much to make it toasty warm throughout the winter, more to minimize the drafts and to help keep the shop at a working temperature for epoxy
  • Tool repair and maintenance:
    • New blades for the thickness planer
    • New wheel tires and, possibly, a new motor for the bandsaw
So, what are the next stages?
  1. Sanding, epoxy coating and painting the inside of the hull.
  2. Marking, cutting, fitting and installing the anchor well deck.
  3. Marking cutting, fitting ad installing the bunk decks.
  4. Marking, cutting, fitting and installing the cockpit seat tops.
This will keep me busy for a while. When the weather closes in and it is too cold to work in the shop, I'll have my list of 'indoor' projects to keep me busy.

Thursday, November 15, 2012

Isn't that the Truth?!

The planking is done. The last two pieces of planking were glued in place early this afternoon.

The last bit of planking installed on a hull is sometimes called the "shutter plank" (as in "Shutting or closing the hull") but more often it is referred to as the "whiskey plank." Tradition has it that completing the planking is a milestone deserving a celebration - a shot of whiskey being the traditional form of celebration. (Makes you wonder which came first: the celebration or the name.)

From wisegeek.com:
A whiskey plank is the last plank which needs to be put in place to finish a ship's hull. Although a ship is far from finished once the whiskey plank has been installed, mounting the whiskey plank marks a major milestone in the construction of a ship, and many shipbuilders treat it as a cause for celebration.


At any rate, yesterday I thought it a bit presumptuous to consider Gardens' last bit of planking as a "whiskey plank" worthy of celebration. Not so today. When that last piece was glued in place (for the record, it was the aft section of the starboard sheer strake), I felt a great sense of accomplishment and relief. We celebrated the milestone with a toast of Jack Daniels.

"...a ship is far from finished once the whiskey plank has been installed..."


Isn't that the truth?! Sealing, fairing and sanding the hull; fitting out the interior and outfitting - quite a lot left to do. But for tonight I will enjoy the moment.

Wednesday, November 14, 2012

Cold Shop

Today was too cold in the shop to work with epoxy so the last two pieces of the planking were not installed today. Everything is ready and tomorrow is supposed to be warmer - perhaps warm enough…

Dry fit of the last piece on the port side: the lower aft corner has been tightened -eliminating that apparent little flair.


Bow roughed in - needs some work. That top plank looks oddly wide and the sheer looks terribly flat - but it is the camera angle distorting the look.


I've given some thought to how to winterize the shop: plastic film on the three windows, block the edges of the overhead door to eliminate (minimize) drafts, and a heater. I'll also use the warming box I made last winter to keep the epoxy resin and hardener workable. I still have the warming tent that worked so well last winter to facilitate epoxy curing.

Tuesday, November 13, 2012

Planking Almost Done

Getting there with the planking… The last two planks are nearly complete. Just two more short pieces to install tomorrow and Gardens' hull will be planked! Photos tomorrow upon completion of this (to me) milestone.

Sunday, November 11, 2012

Plankng Progress (Really)

The last two days have been productive: Planks 2 and 3 have been installed!


Clearly there is much work to do to clean up the planking once it is all installed.

Today was a day of taking it easy and enjoying the unseasonably mild weather. I also took to heart comments made on the John Welsford Yahoo group concerning a neat and tidy shop making the boat work easier. I had let my workbench become so cluttered I couldn't find tools (that I had just used) yesterday. Today I cleaned and organized the workbench, including the addition of a 3-drawer tool chest. Now that the shop is neater and tidier, perhaps I'll remember to put tools away at the end of the day...

Planking will continue tomorrow. Bevels and lands for the fourth plank(s) to be cut in the morning. Cutting, fitting and gluing the planks will follow.

Friday, November 9, 2012

Planking Continues… and About Those Gains

Planking continues and the work is going well. Hey, I may even have the planking completed by my projected target date of next Wednesday…

As for the gains… I looked at photos of completed Pathfinders for inspiration and found that some (perhaps many?) carry the lapstrakes all the way to the stem (in other words, the builders didn't cut the gains). This discovery sent me back to the instructions and drawings for guidance and, there is NOTHING in the written instructions about cutting gains or smoothing the bow. The drawings show the lapstrakes carried forward to the stem. Could this be? Have I been making life more difficult than it needs to be? I think so. A DECISION: I am not cutting the gains to smooth the bow of Gardens. I will carry the lapstrakes to the stem and cap the ends with an outer stem.

There, I feel better.

Wednesday, November 7, 2012

New Shop Accessory

Dust collection is always a concern and consideration when working with wood. My shop is pretty rudimentary - band saw and thickness planer are on castors for flexibility - and the shop-vac rolls around as needed.

I have sort of coveted fancy dust collection systems even while realizing a fancy system is more than I need or can justify. Over the years I've seen the Dust Duputy cyclone separator (a plastic fitting to install on a 5-gal bucket which serves to make a shop-vac a two-stage vacuum) but never went ahead with getting one. Recently, on various small boat internet forums, I have seen posts for making your own cyclone separator patterned after the Dust Deputy. Frankly, this sort of DIY projects are fascinating but often impractical for me. So, early this week I searched Amazon for the Dust Deputy by Oneida. Dust Deputy by Oneida. Okay, $40 and a little finagling to fit it to the top of a 5-gal bucket. I almost ordered one…

But... I spotted this:
The Woodstock Mini 2-Stage Cyclone Separator. After reading the reviews I decided it was worth 'risking' $22 on it. I ordered one.

It arrived today and, like a kid on Christmas morning, I ripped open the box and hooked it up. This thing flat out WORKS! The dust and bits vacuumed up fell into the 5-gal bucket, not the shop-vac. This will help prolong the life of the filter, to say nothing of how much easier it is to empty a 5-gal bucket than the shop-vac. Of course, the Dust Deputy might be twice as effective - but I'll never know because I'm pleased with this product and recommend it if you are using just a shop-vac for dust collection in your shop. (The usual disclaimers apply - I have no financial interest in this product. I am a happy customer.) Oh, and by the way, I installed another piece of planking today and the planking of Gardens is now past the half-way point.

Monday, November 5, 2012

Planks, Gains and Winter Projects

Each plank (or piece of plank) installed on Gardens improves my techniques: the planks fit better and there is much less struggle involved with installing them. Now, the struggle may be easing because these recent planks have less twist in them but I'd like to believe I am getting better at this. As it is, I am planning to complete the planking by November 14. Since I have a history of perpetual optimism, we'll se…

The gains are still an issue. Joel's nifty Gain Machine may be the solution for the next four of the six sets of gains (the garboards are on the boat and, so, those need to be cut in place). In the meantime, I am still experimenting with a Japanese pull saw and a large rasp.

Temperatures around here are dropping - the season's first dusting of snow fell Saturday morning. I will soon need to shift projects from the shop to the house. I've begun a list of projects I can work on in the house such as the sails (SailRite kits), rudder cheeks, tiller and other bits and pieces. The mast, boom and yard will have to wait until next spring as access to the basement precludes moving materials in or the finished spars out. I do not anticipate a lack of boat bits to work on when it is too cold in the shop.

Saturday, November 3, 2012

Cutting the Gains

Cutting the gains - to fair the planks into a smooth surface at the stem - has been one of those "how the heck am I going to do that?" concerns of mine since before deciding to build the Pathfinder. I mean, I admire those great looking lapstrake boats with their planks blending into such a fair and elegant surface at the bow. I just didn't understand how to do that. Oh sure, I read about, saw step by step photo instructions and watched videos - and I finally understood the mechanics of the process. I still wasn't sure I could do it.

Today, after working on the first set of gains (there are six sets), I'm still not sure I can do it. My rabbet plane didn't do what I saw done in photos - might be operator error, though. A block plane was actually more effective but not much. A 14" horse-hoof rasp was not very effective either. I tried the grinder but that is hit or miss - practice pieces weren't too bad but I don't like the results I got on the hull.

Now, despite not being pleased with my efforts, I did make progress and will continue working out a methodology that will work for me. This first gain needs more workbut that last gain ought to look pretty good.


Between the various attempts to cut the gains, I began the third plank. So, the first third of the third plank on the port side of the hull is in place. This was a "feel-good" installation as everything went well: grinding the bevels; marking off and cutting the piece; fitting only required a couple of very minor tweaks and the gluing.

Thursday, November 1, 2012

Planking Continues...

After returning from my annual fall road trip (Baldwin and Munising, MI, Duluth, MN, Bayfield, WI and the Porcupine Mountain Wilderness State Park on Michigan's UP), I have resumed work on Gardens.

Planking continues and my lessons continue as well. Wrestling the garboards into place had me convinced the rest of the planking would be much easier. Well, the second plank is not any easier to fit than the garboard. In fact, while using a 6' length of 2x3 to leverage a portion of the port-side second plank into place, I managed to crack a stringer. The stringer did not split through and a bit of thickened epoxy squirted into the crack seems to be an effective fix.

Cutting the gains at the bow is the next task/skill to master.

Friday, October 19, 2012

Road Trip, Scamp Camp and Sight-Seeing

Work on Gardens is on hold for a week while we take time to visit my sister in Duluth, MN.

Wednesday morning we left Gowen, MI and headed north toward Michigan's Upper Peninsula where we planned to stop for the night in Munising. Our first stop, though, was in Baldwin, MI, where we stopped to see what was going on at the Michigan Scamp Camp. I was pleasantly surprised to see familiar faces from June's Small Craft Skills Academy in Machinaw City, Michigan. Five Scamps are being built this week. They are doing a lot of prep work ahead of assembling the hulls. Here are a few photos from our visit:


We said our helloes and goodbyes and continued on our way north, enjoying the last bit of fall color in lower Michigan. We spotted two pairs of bald eagles, too, which was a great treat. Sorry, no photos of the soaring eagles!

Munising was quiet - not many tourists out and about on a mid-October afternoon. We scouted out the municipal boat ramp with thoughts of a future trip to Grand Island just off-shore from Munising before continuing our travels through the UP and northern Wisconsin before arriving in Duluth mid-afternoon on Thursday.

Today we drove up the North Shore visiting Gooseberry Falls and Split Rock Lighthouse. Dinner tonight at the Scenic Cafe. Good times visiting with family. While out on the road I'm not getting work done on Gardens, but the time away from the barn is a good opportunity to recharge and get ready to finish the planking.

Monday, October 15, 2012

Maybe it is the destination...

It's the journey and not the destination... well, maybe...

With boat work, it is not so much "unforeseen steps" (mentioned in my previous post) that slow me down. It is my own optimism: The garboards were tricky and tedious to install and, since they are the largest planks with the most bend/twist, I naturally assumed/hoped/believed the rest of the planks would be easy (by comparison) to install. I was wrong.

The second planks have been started but I have found that a narrow plank is a bit resistant to a bend across the narrow dimension. Oh, I've wrestled the second section of the second planks into place but it wasn't easy. The end result is quite satisfying but getting there is considerably less enjoyable.

No new predictions on how much and how soon…

Friday, October 12, 2012

Planking Progress: Garboards Installed

The garboards have been installed!

Messabouts are great! The sailing is wonderful but there is much to be learned - even in casual conversation. One never knows when the next helpful hint will pop up. At last weekend's SailOK, several possibilities for fitting the garboard were made. I don't doubt that all were good suggestions. I picked one and went with it.

Cutting the foremost three feet of the garboard at 45° to the grain of the plywood worked to let me bend and twist the piece into place. Fitting the last piece to fill the final gap in the garboard proved to be fiddlier than bending & twisting that front piece.


The tingles (plywood straps overlapping the joins between plank sections) have been installed on the interior of the garboard plank. I'll finish filling and fairing those joins when the hull has been turned over - but there is a great deal of work to be done before I get to that point.

The second plank has been started. I expect the planking will become easier and faster - but I won't be surprised to run into unforeseen steps to be taken along the way.

Tuesday, October 9, 2012

Back From Sail Oklahoma

Sail Oklahoma 2012 was a success despite the wind, the rain and the cold. Sailing was great on Thursday but there was no sailing on Friday or Saturday due to the bad conditions. Sunday was a bit warmer, dryer and less windy - but I didn't take advantage of it as I listened to Mik Storer's presentation on balanced lug sails before packing for the road.

Not all was lost on Friday and Saturday as there were numerous presentations on a variety of small-boat topics: Dave Nichols on sail making; Richard Wood on multi-hull designs; Dave Gentry on skin-on-frame construction; Howard Rice on small-boat expedition sailing; a panel discussion on sailboat racing; and a designers' forum featuring Jim Michalak, Richard Wood, Dave Gentry, Dave Nichols and Mik Storer. Mixed in with all of that was the catching up with old friends and meeting new ones. It was a great weekend.

Sail OK was successful for me on several levels - including getting ideas and suggestions for installing the garboard planks: begin at the foreward end (yep, someone else suggested what I had thought of on my way there); use a shorter piece; and use a shorter piece and cut it at 45° to the grain of the plywood. Another suggestion I am looking into to facilitate the installation of the remaining planks is to use a nail gun with composite/plastic brads. The nail gun is easier/faster than screws but I don't think the brads will work to pull the garboard planks into place.

Today was an unload-the-car-and-put-things-away day. I will be back in the shop tomorrow.

Tuesday, October 2, 2012

An Insight Going Down the Highway

Today I hitched the Karen Ann to the back end of Blue and headed down the highway toward Eufaula, Oklahoma for SailOK. Not a bad drive - not much traffic, plenty of cloud cover to keep things comfortable, not too much rain and only a mildly annoying detour around St. Louis late in the day. I hope to arrive at Sail OK early tomorrow afternoon.

Spending 12 hours behind the wheel allows for a lot of thinking… One of the things I thought about was how to twist & bend those lowest plank pieces in the front of the boat. I have been working from aft forward and with the aft end of that piece attached (clamped and screwed) to the stringers and bottom panel, I haven't been able to twist and bend it into shape between the stem and Frame #2. So, somewhere in the middle of Illinois this afternoon, I thought about how the hull panels of the Karen Ann had gone together (I saw the twist & bend in the hull panels every time I checked the rear-view mirror), wondering if what I learned building the KA might help with Gardens.

Then it hit me: KA was assembled front to rear so the twists & bends were addressed without the aft end of the panels fastened to anything. Maybe that will help with my current problem. Next week, when I return from Oklahoma, I'll give that approach a try - perhaps with the aft end loose the plywood will be a bit easier to twist & bend into place. Hope that works.

Saturday, September 29, 2012

Now I Know Why...

Those first two partial planks were easy, even if I didn't think so at the time. The second pieces were easier - and I lulled myself into believing planking the boat would be an easy, simple and even pleasant experience.

The third piece - the forward eight feet of the lowest plank is very difficult. The plywood has to bend and twist in at least two dimensions simultaneously - and it doesn't want to do what I want it to do.

So, the short version is: a) the foreward pieces of the lowest plank have been cut out and partially fitted; b) the plywood doesn't cooperate (as if it were making a conscious choice…); and c) I ran out of time last night. Those foreword pieces have not been glued into place.

The first partial planks were easy.

Wednesday, September 26, 2012

Planking - It Really Does Get Easier!

Today I installed the second piece (of 3) on both of the lowest planks. It really does get easier.

Using a narrow piece of luan, dividers, a pencil and a straight edge, I marked off the plank. Then I transferred the marks to the planking material (9mm meranti plywood):


The plank was cut out and fitted (and refitted numerous times) to the frames & stringers on the starboard side. When I was happy with the fit, I flipped the plank over and clamped it in place on the port side. It was very satisfying to see it fit just right! So, using that piece as a pattern, I traced and cut out the second piece of lowest plank for the port side.

After lunch we - I had help - installed both pieces. I'm quite pleased with the results.


Tomorrow I plan to mark off, line off, cut, fit and install the last two pieces to complete the two lowest planks. These may be tricky as the ply bends and twists in two (or is it three?) dimensions but others have done it so I know it is doable.

Today's work was easier than those first two partial planks earlier in the week.

Tuesday, September 25, 2012

Casting Lead - An Experiment

As noted a couple of days ago, I bought enough lead for the CB weight and a spar measuring weight (10kg weight used to measure the stiffness of yards and booms). Doryman suggested making a lead-line - which is an excellent idea for a small boat intended for exploring unknown (to me) areas.

I found a website describing how one guy made a lead-line. He wrapped a shape with aluminum foil, supported the shape with sand inside a can, removed the solid shape, melted and poured lead. That's the short version. Here's the link to his post:

http://www.jonnymooresailing.co.uk/leadline

Using a small (1.5" diameter plastic bottle about 6" tall) bottle for the shape, I wrapped it in foil (double layer of heavy duty aluminum foil), set it in a large enough can, filled the can (around the shape) with sand and removed the plastic bottle to create my mold. So far so good…

The two-burner propane camp stove was set up outside and a used, heavy-duty pot (from Good Will) was large enough to hold one of the 13.5 lb. pigs of lead. So far so good…


And then things didn't go so well… An hour of heating did nothing… heck, the pig was barely warm to the touch… I turned off the stove to think about this…

Back at it, I relit the stove, turned the heat on Full-Blast HIGH… and waited… 20 minutes later - nothing. I cut a small chunk off another pig and put it in the pot - and watched it melt within seconds! I started thinking about cutting the pigs into small pieces to facilitate melting when I realized the lead in the pot was just about completely molten… 35 minutes of Full-Blast HIGH heat did the trick (why didn't I think of that sooner?).

After spooning a few bits and pieces of non-lead debris from the surface, I poured the lead into my mold. All went well… All I had to do was wait for the lead to cool which it eventually did… Pulling the mold from the sand and unwrapping (what I could) the foil left me with this:


It is an incredibly rough casting which weighs about 3 lb. It is about the right size but much too rough to work into a final, usable lead-line. The really nice characteristic of lead? It can be remelted and recast. I will work on my foil wrapping and mold making.

It is fun experimenting like this with a simple project (easy shape and not too much lead involved) to learn what I need to learn to cast the CB and spar weights - and a lead-line).

Sunday, September 23, 2012

Planking - The Easy Ones (Updated with photos)

According to the written instructions accompanying the Pathfinder plans, the first two partial planks are "the easy ones." If that's the case, I may be in for a long-term project planking the boat. These planks have not been particularly easy for me. Now, a huge part of that is the learning curve - figuring out the process: bevels on the stringers and planks. Also, figuring out the apparent discrepancies between the drawings and the written instructions was interesting.

On the other hand, I think their short length may be what makes these the "easy planks." Subsequent planking should actually become easier to fit despite their longer lengths. Of course the "easy ones" characterization just may be John Welsford's sense of humor shining through.

Here is Gardens ready for planking…


Port side:


Starboard side:

At any rate, the first two pieces of planking have been fitted. I have set myself a goal: complete the first plank on both sides before I leave for Sail OK on October 2nd. That should be doable but I lose a half-day this Tuesday with some volunteer work. Saturday's visit to Ann Arbor will cost at least one full day and I'll need at least one full day to make sure Karen Ann is ready for Sail OK. I will have to plug away at completing those first two full planks in order to meet my goal.

But, the important thing for me is this: Those first two partial planks - the "easy ones" - are on the boat. I am over that hurdle.

Thursday, September 20, 2012

Idling Along...

Inventory management around here needs some improvement! I ran out of colloidal silica before the new supply could arrive. So, actual work on Gardens has been in an idling mode for a day or two.

In the meantime, I picked up 9 sheets of meranti plywood (9mm and 6mm) at L.L. Johnson Lumber in Charlotte, MI. The ply is for planking, bunk-flats, seats, decking and more. Charlotte is an easy one hour drive from here through the countryside and farmlands of Central Michigan and it was pleasant to see the changes late summer brings to the landscape. I tidied up the shop in general and the workbench in particular. Then there are a few stray projects needed to get the Goat Island Skiff ready for Sail OK. So, I've been busy but made little progress on Gardens so far this week. (I'm ignoring any number of tasks I could be working on for Gardens: shaping the CB, cast the CB counterweight, shape the rudder and other such items.)

The new supplies arrived late this afternoon - and the recently ordered angle grinder will be here tomorrow.

It is time to begin planking Gardens' hull!

Monday, September 17, 2012

Lead for the Centerboard

Last week I found a great local source for lead. The wooden centerboard needs 45 pounds, or so, of lead to prevent it from floating up into its case. I have been reading about casting lead on various threads on different forums for some time now and the one common issue in all the threads is where to obtain lead. Several months ago I asked several local tire shops (a frequently cited source for lead) about wheel weights. All of the shops I spoke with either re-use their wheel weights or take them to a recycler. The ones that recycle them were not interested in saving any weights for me. So, I was concerned about where to obtain lead.

Buying 45 pounds of lead at the retail level did not seem cost effective to me. Down-rigger weights, scuba weights, lead shot, sinkers - all proved to be too pricey for me.

Three different people, when asked, suggested Greenville Steel. Okay, I've seen their shop on Michigan 91 but it doesn't look like it would have lead… (yeah, an assumption): Steel is in their name; their sign mentions steel fabricating and their building looks very neat and tidy - almost pristine. When I asked in the office if they handle lead, the woman at the counter asked me how much I was bringing in? No, I want to buy some. She seemed amused that any one would want to buy lead…

Looks are deceiving. Greenville Steel is a "recycler" (what used to be called a "scrap yard" and before that a "junk yard"). The yard out back behind the pristine building and tall white fence is full of stuff - including lots of lead. The bin of clean lead must hold several tons of the stuff and the bin with dirty lead was larger. Actually, the guy in the yard was more than amused that I wanted to buy lead. Not sure why that strikes anyone as funny but it does.

These five pigs of clean lead weigh a total of 67 pounds and cost me $30.00. I was pleased with the price (less than $.45/lb.) and that I found a source for lead.


I'll melt some of the lead to cast the weight for the centerboard. The rest will be cast into a 10kg weight to be used to measure the bend in the spars for my balance lug sails.

Friday, September 14, 2012

All eight stringers have been fitted and gluing has begun.


(Note: not all stringers were fitted to the transom in the photo. All stringers have since been fitted bow to stern.)

The sheer stringers fit much better (no bump in the sheer line and no excessive force needed to fit the stringers in place) after the notches in Frame #2 were cut down to remedy my measuring error on that frame. I'll fair the top of the frame before installing the deck.

Wednesday, September 12, 2012

Measure Twice - Cut Once

Measure Twice (or more) - Cut Once (or make repairs later)

Here is part of the double "S" curve in the sheer line when I forced the top stringer into place (sort of):

Swooping up from F3 to F2:


Swooping down from F2 to F1:


It swoops up from F1 to the stem. (but no photo)

It was a struggle to force the stringer into place - lots of twisting, lifting pulling, pushing... And, the stringer does not sit well in the notches of Frames 1, 2 and 3.

This afternoon while continuing the effort to force the starboard stringer into place I unscrewed it from Frame 2... I pulled the stringer from the notch and tried to fit it to its notch in Frame 1 and then on to the stem. Like magic, it fit - perfectly: a nice, smooth and fair swoop right up to the stem.


Of course, the stringer was NOT in its notch in Frame 2:


It is a full 40mm lower than the notch - way too much to cut away. What did I do wrong? Checking the plans against the frame as built, everything seemed to match. Then I took another look and found the 40mm! The dimension from the W/L to the top outer corner of the frame is 590mm, right? NO! That dimension is 550mm but it is smudged, smeared or otherwise not entirely clear on my drawing. I decided to ask another pair of eyes to look at the plans to verify what I found. Under bright light, the dimension was read as 550mm - but my friend agreed that it could easily be read as 590mm.

Great! I now know I have to take 40mm out of Frame 2. What I don't know is whether the top of the frame is correct (711mm above W/L) or not. I'll check that in the morning before deciding where and how to remove those extra 40mm.

Monday, September 10, 2012

Stringers are Strung... sort of...

Six of the eight stringers have been installed and, from what I can tell, those six (the lower three on each side) are fair and symmetrical from side to side. The last two - at the sheer - are giving me some fits.

However, slowly but surely, I am working on getting those last two stringers fair and symmetrical as well. The issue, for me, is that the notches in Frame 2 seem to be too high - high enough to create a 'bump' in the sheer at that frame.

Double and triple checking the frame against the plans, it appears to be correct and the bump shows on both sides so I suspect I erred somewhere along the line. There is a solution. I am enlarging the notches bit by bit to eliminate the bump but it is slow going. I expect I will need to fair the top of Frame 2 so it meets the stringer at the sheer.

Further expectation is to complete the stringers tomorrow and begin planking by week's end. (Why is it expectations never seem to be met?)

Saturday, September 1, 2012

A Rainy Night In Georgia

Okay, so it isn't raining and it isn't nighttime but I am in Georgia for the Labor Day weekend.

While working on the stringers last week, I realized certain supplies are running low. It is time to order more epoxy resin and hardener, silicon bronze fasteners, disposables (gloves, stir cups, stir sticks, etc.) and, at long last, the plywood for planking the hull! Ordering on-line is such a convenience - order from anywhere and a brown truck or a white truck or the letter carrier will deliver them to my door in Fenwick. Nice. Today's "anywhere" is a back porch in Atlanta.


Knowing the new supplies will be waiting for me when I return from the weekend is a good feeling. I'll pick up the plywood from L.L. Johnson in Charlotte, MI http://www.theworkbench.com/ next week after I've unpacked from this outing and put the new supplies away.

Stray fun thought of the day… Perhaps this image could be the inspiration for a logo for Gardens or, perhaps, for the workshop in Fenwick:


Maybe it will rain tonight...

Sunday, August 26, 2012

Stringers

For nearly four months the installed frames have suggested the Pathfinder boat-shape that is to be Gardens of Fenwick.

Today, with four of the eight stringers in place, that boat-shape is so much more than a mere suggestion. Amazing what four long, skinny sticks of wood can do...


The last four stringers will be installed tomorrow.

Planking will begin soon after Labor Day.

Thursday, August 23, 2012

Sawdust, Epoxy and More...

Last weekend I resolved to find a way to install the chines and decided to laminate them in place: each chine to be three pieces (3/4", 1 1/4" and 3/4") glued side by side in place.

On Monday I began milling six (actually 12) new pieces (sawdust). On Tuesday I scarfed (epoxy) those 12 sticks into the six pieces for the chines.


Wednesday I fiddled with the pieces to fit them. I also cut notches in the frames for the stringers and worked on finishing up the transom (more).

Today I installed the first two chine pieces on each side.


Tomorrow I will add the third piece on each side to finish the chines... and begin installing the stringers.

Saturday, August 18, 2012

Summer's Interlude… Summer… a wonderful time of year! Great weather sets the stage for enjoying many activities… But there is a price to pay for the season's weather, activities and fun: For me, at least, that price this summer has been less time spent working on Gardens of Fenwick.

As previously reported, June found me at the Small Craft Skills Academy in Mackinaw City, Michigan. Four great days with other small boat sailors brushing up on old skills and learning new ones from everyone - facilitators and participants alike! If you get the chance to attend one of the Academy's sessions - do it!

The family's July sailing vacation this year was spent on McKay Bay in Les Cheneaux Islands at the north end of Lake Huron. The plan was to take my Goat Island Skiff (the Karen Ann) for some fun sailing and, perhaps, a sampling of boat camping. Unfortunately, a relatively minor mechanical problem kept us from taking the Karen Ann… We were, however, able to get some sailing in on Wildcat, the family's Com Pac PicNic Cat).

In early August I joined my brother for Pedal to the Point, an 80-mile bike ride from Brunswick, OH (a suburb of Cleveland) to Sandusky, OH. The ride is a fund-raiser for MS and this year nearly 3,000 riders participated! I'm glad I rode as much as I did preparing for that ride. It was fun and I'm looking forward to more bike riding this fall.

I was all set to participate in the Michigan Pirate Fest in Grand Haven the second weekend of August - but a nasty summer cold caught up with me and kept me from sailing. Ah… next year I expect to take Gardens to Grand Haven for the pirate 'raid' on the town.

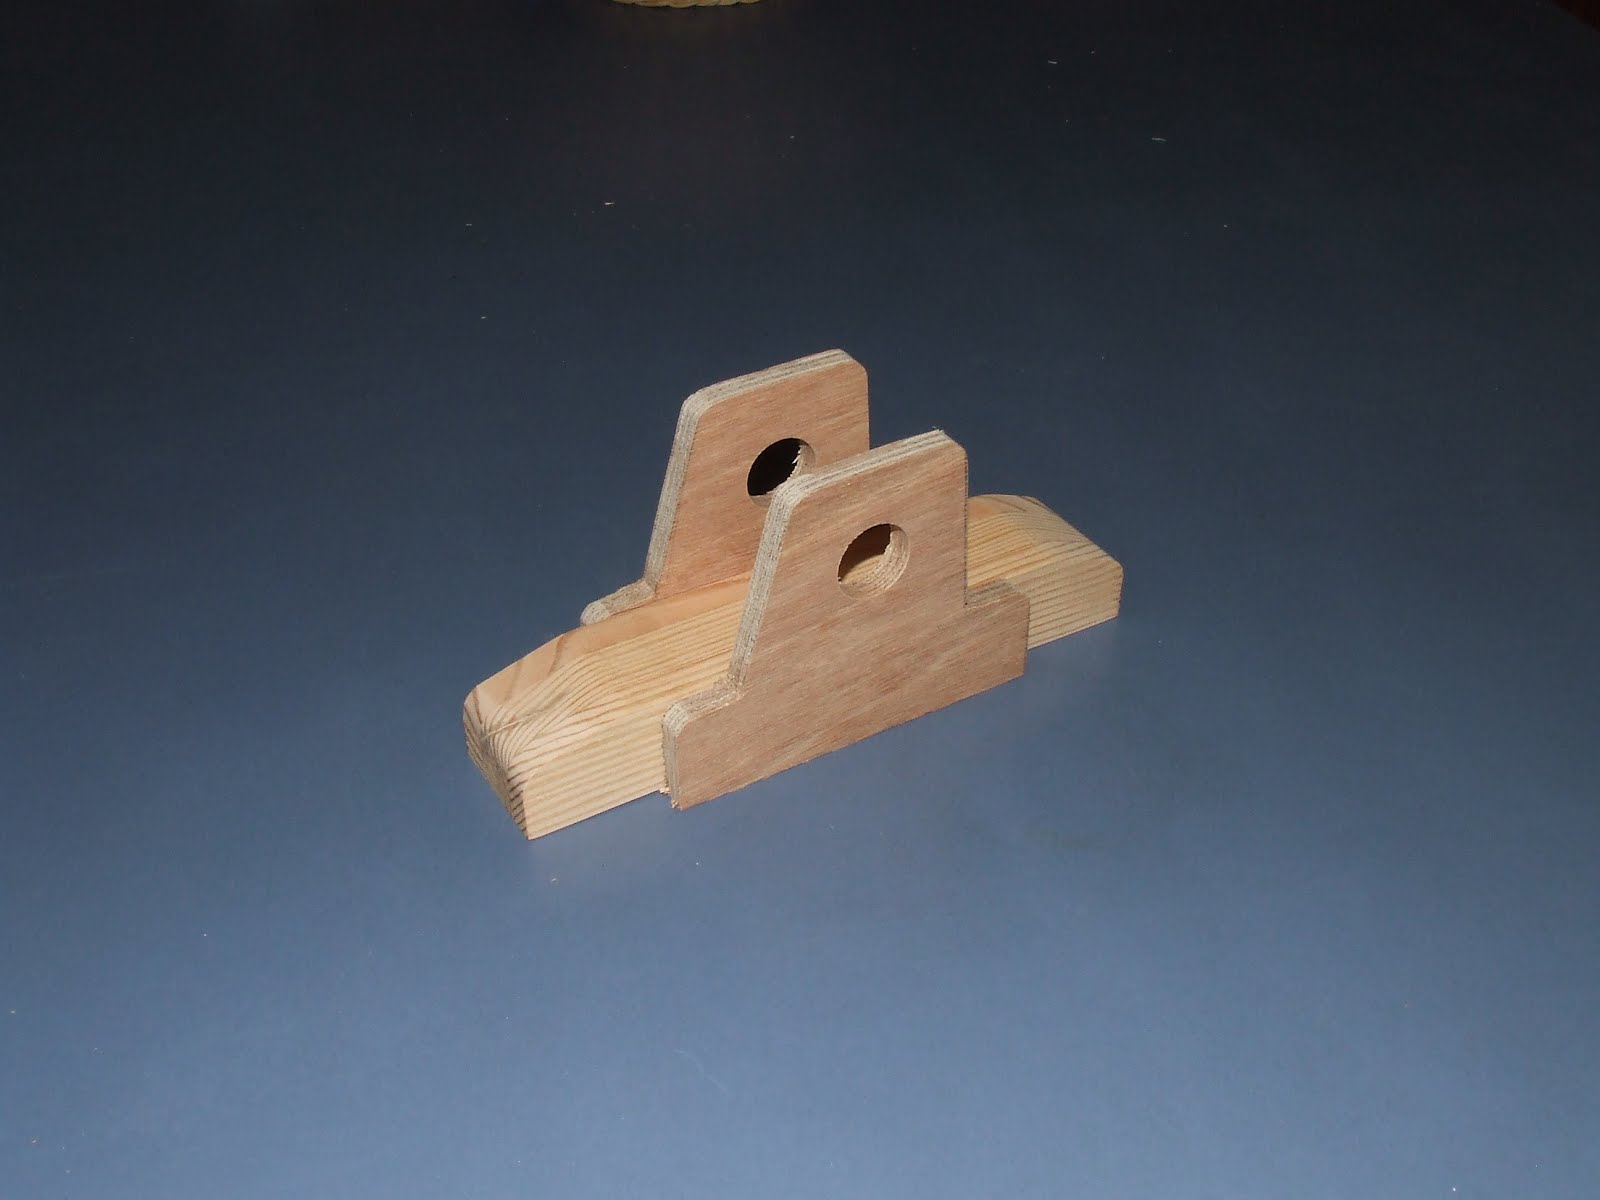
Throughout the summer we've been riding bikes, gardening, traveling and having a good time. The time away from Gardens has given me time to think about some troublesome (to me) building details (the chine, among others) and has provided me some interesting food for thought. In other news, John Welsford confirmed the mast locations for the balance lug yawl rig to be the same as for the gaff-yawl sailplan shown in the plans (this is great news: no modifications needed).

So, not much recent boat building progress to report but I have been busy living life and enjoying every minute of it! The time away from the build have served to energize me and I will soon be making sawdust and mixing epoxy again!

Thursday, July 5, 2012

Temporary Solutions and Oar Leathers

I built my oars more than two years ago… I used inexpensive Home Depot 1 x 6s on the theory that I didn't want to butcher expensive lumber in my first attempt at making oars. The oars made their debut - without leathers - in March of 2010.

Shaw & Tenney sell a kit for oar leathers, which I ordered in early 2011. Reading S&T's instructions and other comments on-line, I was intimidated… installing the leathers seemed to be some sort of mystic transmutation I couldn't comprehend. The examples of oar leathers I've seen on-line have all be gorgeous works of art. I was intimidated.

Over the last two days I've overcome that intimidation and installed the leathers… they are not artistic triumphs but I suspect they are functional. I will find out later this month when I take the Goat Island Skiff to Cedarville, MI for a week (or so) of sailing expeditions.

Beginning the installation:


Interesting that the stitching is different on each oar… and I thought I was doing them the same…


New varnish (after sanding) will finish off these oars.

I am reminded of a comment a friend made to me when I stated these were "practice" and "temporary" oars… "There is nothing as permanent and long-lasting as a temporary solution." I think he is right.

Monday, July 2, 2012

Another month has come and gone...

It's true... June is gone and we are into July. I am busy with maintenance and re-fitting Karen Ann, my Goat Island Skiff, so not much work has been done on Gardens lately. See what I've been doing on Karen Ann at http://goatislandskiff-sacramento.blogspot.com/

Monday, June 25, 2012

Good Intentions Interrupted

When I last posted, I told myself I'd post more often... Didn't happen as work on Gardens has slowed a bit to make time for a few other projects.

I attended the Small Craft Skills Academy seminar in Mackinaw City, MI last week and I spent much of the prior two weeks getting Karen Ann, my Goat Island Skiff, ready for that event. The Academy is a great four-day seminar combining classroom lessons with on-the-water drills and practice. It was a great refresher for old skills; great instruction for new skills; a great resource for new (to me) ideas for preparing Gardens for adventure sailing; and a wonderful opportunity to make new friends.

Here are a few photos taken during the SCSA in Mackinaw City:

Karen Ann on the beach at Mackinaw City:


Engineless docking drills in the marina:


A Michalak "Mike's Boat"


The Mike's Boat shown above is similar (albeit a much different hull shape) to the Pathfinder in terms of length, beam and weight - and it carries a balance lug yawl rig. One take-away for me from the Academy is the confirmation that I want a balance lug yawl rig for Gardens. I'll contact John Welsford to discuss this sailplan for my Pathfinder.

Work will resume on Gardens while I continue needed maintenance work and minor modifications on Karen Ann before taking her north to Les Cheneaux Islands next month for a week of sailing.

Friday, June 1, 2012

June 1st? Already?

Don't know what happened to May but it is gone… It is June 1st and progress on Gardens continues.

I've been working on Gardens but the work is mostly more of the "invisible" kind. The chines are nearly ready to install (yes, seems they were "ready to install" a couple weeks ago…). The centerboard and rudder are being carved into shape (actually, this work IS visible - but, alas, no photos today). The mizzen sail kit sits patiently waiting for me to crank up the sewing machine while kits for the main and jib are yet to be ordered. Once the chines are installed I can fit and install the stringers - and begin planking!

Along with continuing with Gardens, I am preparing Karen Ann for the Small Craft Skills Academy here in Michigan in a couple of weeks. Cleaning, sanding, re-rigging, re-bending the sail to the spars (oh, yes, finishing and outfitting a new boom) and a bit of varnishing before setting out for Mackinaw City on the 16th.

Wednesday, May 23, 2012

Fitting the Chines

After much consternation and frustration over not being able to bend the chines into place, I received some good suggestions on possible solutions.

Steaming the chine pieces was rejected as they are scarfed together for the length.

Laminating with 2 or 3 thinner pieces seemed like a good idea but... the 9mm thick pieces didn't bend any easier than the 20mm thick ones.

I considered using two pieces for each chine and steaming each piece to bend into place but before gathering parts and materials for a steam box, another idea came to mind: Make each chine out of two pieces but cut them to shape, glue them in place and overlap the ends (sort of scarfed in place).

Using the plywood cut-offs from cutting out the bottom, I made patterns for the two pieces (only two patterns needed as the pieces are mirror images). The patterns fit on a 1x6, so I bought 4 boards and cut out my pieces.

Here is a view of the foreward starboard chine piece being fitted.


Still some work ahead to get all four pieces fit and installed but I'm no longer feeling consternation or frustration.

Sunday, May 13, 2012

Minor Obstacle

Okay, so things are going pretty well - I'm ready to fit and install the chines. Unfortunately, the chines are not ready...

The plans spec the chines at 20mm x 70mm x 5,790mm (that's 3/4" x 2-3/4" x 19'). The chines fit flat on the outside of the hull bottom so they have to bend in that dimension. They also conform to the rocker in the bottom so they have to bend in that dimension...

I'm using Monterrey Pine and it is not going to bend in those two directions... not without some serious convincing. Steaming the wood seems the logical means of "serious convincing" but steaming wood is one of those black-box mysteries I've always considered to be beyond my skills. However, I am thinking about it...

Several questions come to mind:

1. What do I use to steam 19' long pieces of wood?
2. Can I fit the wood and then re-steam it once I'm happy with the fit? (I don't think I'll be able to remove them if I let them sit long enough to dry to shape.)
3. How do I glue steamed wood in place? Can I glue wet wood after re-steaming?

Okay, I can answer the first question. It is the other two that are troubling me.

Any suggestions?

Thursday, May 10, 2012

Back at it... Again... Finally...

After more than one false start (following an annoyingly persistent cold) I am back to work on Gardens - along with several other works-in-progress:

Gardens:
Building the transom and prepping it for installation
Cutting notches in the frames to accept the chines
Milling chines down to 65mm to facilitate the needed bending/twisting

Karen Ann:
Clean-/refit prepping for the Small Craft Skills Academy next month
Lots to do!

Cycling:
Back to riding after too many weeks of not riding
Short 25-mile ride on May 19th
Training for 75-mile ride in August

Sunday, April 29, 2012

Fiddly Fitting of a Finicky Frame

Fitting the seat fronts and Frame 6-A (aka Frame 7, depending on your plan-set) today was an exercise in fit-mark-cut-repeat (many times over). I did get parts fitted - including the bevel on 6-A to fit the bottom of the boat.

One can visualize the cockpit taking shape… One could actually see the cockpit taking shape had I remembered to use the camera this afternoon.

The transom is next...

Friday, April 27, 2012

A Side Trip and... Another Project?

Took a little side trip on Tuesday to visit the Heritage Coast Rowing and Sailing project in East Tawas, MI. The project is an evolution of the Scottish Coastal Rowing program designed as a community boat building and rowing activity. The Heritage 23 is based on the traditional Mackinaw boat - a design of historical significance in the Great Lakes region. The Heritage 23 is a beautiful boat:
It was a treat to meet the people involved in the project - too many to name individually - particularly Dave Wentworth (point man for the project) and Alec Jordan (the man behind the kits for the St. Ayles Skiff and the Heritage 23).

I have been enamored with the Scottish Coastal Rowing concept since first hearing about it three years ago. The idea of getting involved in a community boat building project has been rattling around my head for a year or so and the Heritage project is exciting as it is based on a meaningful local design. My visit with Dave, Alec and everyone else in East Tawas was informative and inspiring. As work continues with Gardens, I plan to explore local interest in building a Heritage 23 as a community project. It would be great to build a community boat here in Central Michigan and take it to the shores of Lake Huron for some good fun, camaraderie and competition with other Heritage 23s!

Monday, April 23, 2012

Back At It - Finally

Well, that 24-hour bug turned into more of a 240-hour nasty affliction that kept me from doing much of anything. But, I feel almost normal again so I am back, happily, in the shop working on Gardens of Fenwick.

Installed some doublers on the the spine between frames 1 and 3 went well. Milled more 20mm square stock didn't require a great deal of concentration or strenuous effort but was satisfying to do.

Saturday, April 14, 2012

Time to admit it...

Well, I figured by now to be hanging planks and proceeding at a good pace toward preparing to turn the hull over...

Not to be. What began as a tickle in my throat has blossomed into a full-blown cold (hey, we're ignoring the possibility of it being the flu). This after a casual comment at supper a couple weeks ago, "Oh, I never get sick." Should have known...

So, I have done nothing on the boat since last weekend. But, this is spring and hope springs eternal... I'm feeling well enough to get out to the shop tomorrow afternoon. Hopefully, I will actually make new progress.

Thursday, April 5, 2012

At Last... Assembly Begins

At long last, assembly of Gardens' hull has begun.

The centerboard case was installed (glued and screwed) on Tuesday. Today, Frame #5 was installed at the aft end of the CB case.

The stem/spine and three more frames (##1, 2 and 3) were fitted to the bottom. A few adjustments were necessary - and I discovered another one of those little "better done before installed on the boat" steps (trimming the stem/spine to fit and milling 20mm x 20mm stock for reinforcements of the stem/spine once it is installed). I decided to let things sit overnight before gluing and screwing these four components. This is for my benefit - I want to make sure things are set up correctly and fresh eyes in the morning may see something I missed this afternoon.


The important thing, though, is assembly of Gardens' hull has begun!