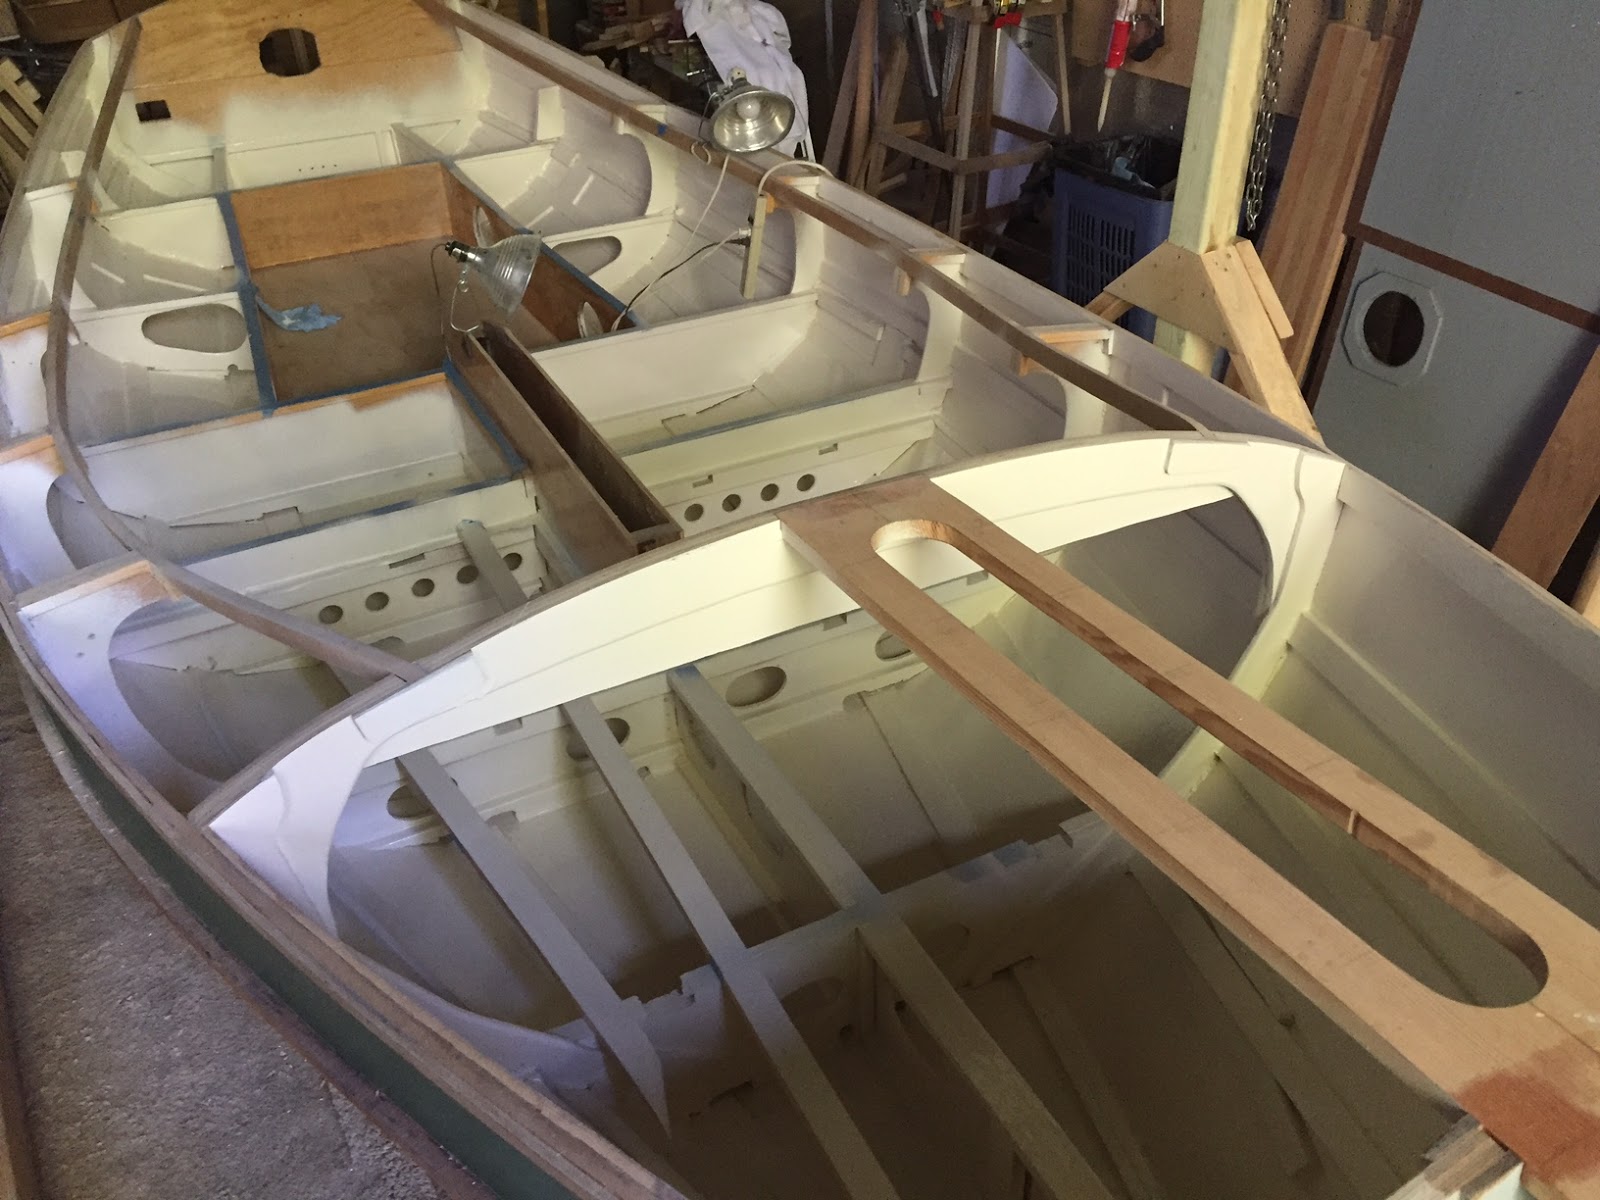
It has been a great week! All interior decking (platform decking and seat tops) has been installed - well, glued in place. Seams between pieces and deck/hull joints need filling/filleting/fairing. But, hey, getting those six pieces installed is huge to me.
The installation of the top decking began yesterday. A shortage of clamps (loaned most of mine out last week!) kept me from installing all but the fore-deck pieces today.
Photo
Last Saturday we installed the centerboard in its case. Figuring out how to cap the case and operate the centerboard has taken a great deal of time and consideration - but I have a solution. Borrowed from others, the idea is to build a box to cap the case. Inside the box will be a lifting mechanism: a double block with becket, a double block and an upright/through deck block. The "proof-of-concept" mock-up worked well.
Experimenting with 6mm and 9mm ply, I figured out two pieces (one at a time) of 6mm ply are easier to bend into place on the underside of the stern deck than one piece of 9mm ply. So, 6mm it is. I also experimented (using cedar and TB-III) with making a mast collar for the top of the partner. That went better than I expected, so I will figure out how to shim/fit the collar to the deck's curve and use what I've learned to make a collar out of some sort of hardwood.
Next up: finish the side decking, install the gunnels, build the CB case cap, and begin work on the coamings.
Sunday, September 17, 2017
Thursday, September 14, 2017
Decking
The platform decking is installed.
The cockpit seat-tops have been trimmed and fitted (to accommodate the modifications to the centerboard case).
Those seat-tops will be installed tomorrow. Installation of the upper decks will soon follow.
The cockpit seat-tops have been trimmed and fitted (to accommodate the modifications to the centerboard case).
Those seat-tops will be installed tomorrow. Installation of the upper decks will soon follow.
Monday, September 11, 2017
A Pivotal Moment
Saturday's installation of the centerboard was a pivotal moment for Gardens. After we spent a great deal of time sorting out the "how" of the installation, the actual "doing" was straight forward and done in short order.
Gardens sat patiently waiting. The centerboard, the case, the tools and the gadgets were prepped for the installation. Jan's help in moving the centerboard into the boat was invaluable. Elmer did the heavy lifting and lowering.
Decking is next...
Gardens sat patiently waiting. The centerboard, the case, the tools and the gadgets were prepped for the installation. Jan's help in moving the centerboard into the boat was invaluable. Elmer did the heavy lifting and lowering.
Decking is next...
Sunday, July 16, 2017
Changes/Additions to the Mast Slot
The mast slot, in its present form, is cut into to king plank and is only one inch 'deep.'
(It will remain cut in the king plank but) I am making it 'deeper' (intending to improve lateral support when raising the mast) by adding 1" x 1½" x [the correct length] doublers on top and bottom on both sides of the slot, increasing the depth to 4". An added benefit is the bottom doublers will add some rigidity between BH1 and BH2
Also under consideration is a mast gate (no not in the plans) as a bit of "belt & suspenders" along with the mast slot plug. The mast gate will be fabricated from CVG DF. A question I have is, how should the grain be oriented?
End grain facing aft (the block shown in the photos is a 'place-holder,' not the real thing):
Edge grain facing aft:
or, Face grain facing aft? No photo but the block could be laminated face grain to face grain.
(It will remain cut in the king plank but) I am making it 'deeper' (intending to improve lateral support when raising the mast) by adding 1" x 1½" x [the correct length] doublers on top and bottom on both sides of the slot, increasing the depth to 4". An added benefit is the bottom doublers will add some rigidity between BH1 and BH2
Also under consideration is a mast gate (no not in the plans) as a bit of "belt & suspenders" along with the mast slot plug. The mast gate will be fabricated from CVG DF. A question I have is, how should the grain be oriented?
End grain facing aft (the block shown in the photos is a 'place-holder,' not the real thing):
Edge grain facing aft:
or, Face grain facing aft? No photo but the block could be laminated face grain to face grain.
Friday, July 14, 2017
Centerboard Case Rebuild
Today I stopped thinking about the centerboard case remediation and began the project by cutting off the top of the case. I used a 4½" circular saw for the lengthwise cuts (it worked well).
The next step is to fit and install plywood doublers to the sides to take the case back to original dimensions. I will add packers fore and aft as needed. Additional seat-top support material will be installed as needed to make up for the support lost to the plywood doublers. A new cap will be added after the centerboard itself is installed.
It is difficult to cut a chunk out of your boat - even when you know it has to be done. (Had to be done because I went off plan for the centerboard lifting arrangement and the case design.)
As for the interior paint - at least as far as the bilges and inside of the hull are concerned - I like the three coats of paint. I need to do some brush work in some nooks and crannies to tidy things up a bit, but I am also thinking another coat or two wouldn't hurt anything...
The next step is to fit and install plywood doublers to the sides to take the case back to original dimensions. I will add packers fore and aft as needed. Additional seat-top support material will be installed as needed to make up for the support lost to the plywood doublers. A new cap will be added after the centerboard itself is installed.
It is difficult to cut a chunk out of your boat - even when you know it has to be done. (Had to be done because I went off plan for the centerboard lifting arrangement and the case design.)
As for the interior paint - at least as far as the bilges and inside of the hull are concerned - I like the three coats of paint. I need to do some brush work in some nooks and crannies to tidy things up a bit, but I am also thinking another coat or two wouldn't hurt anything...
Sunday, July 9, 2017
Paint, Centerboard Case and Mast-Slot
Bilge and Interior paint are, for all practical purposes, done. Some touch-up work with a brush is left to be done in corners, crevices, and spots the sprayer couldn't reach.
So, now there is a pause before beginning the center-board case project, installing the center-board, and installing the seat tops. I'm giving myself the chance to see what I'm missing… (I can install the cockpit seat tops without interfering with the work on the center-board case, but I want to make sure I'm not forgetting something.)
On the drawing board is how to secure the plug in the mast-slot. Several possibilities exist but the longer I think about it simpler solutions come to mind. I'm close to a deciding on a 'final' design.
So, now there is a pause before beginning the center-board case project, installing the center-board, and installing the seat tops. I'm giving myself the chance to see what I'm missing… (I can install the cockpit seat tops without interfering with the work on the center-board case, but I want to make sure I'm not forgetting something.)
On the drawing board is how to secure the plug in the mast-slot. Several possibilities exist but the longer I think about it simpler solutions come to mind. I'm close to a deciding on a 'final' design.
Tuesday, July 4, 2017
Sanding, Paint and Varnish
Working on the centerboard: prepping (sanding) for epoxy and fiberglass.
More painting of the bilges and interior. (With sanding between coats of paint)
More varnish on the tiller.
Thinking about the process/sequence of cutting off the top of the center board case (to install centerboard) and rebuilding the case.
More painting of the bilges and interior. (With sanding between coats of paint)
More varnish on the tiller.
Thinking about the process/sequence of cutting off the top of the center board case (to install centerboard) and rebuilding the case.
Subscribe to:
Posts (Atom)