Congratulations to Rik on the successful launch of his Pathfinder! See his photos and watch his video on his blog post, Salt.
Keep the sailing photos, videos and adventures coming, Rik. This is the sort of thing that will get me through the looming winter!
Sunday, November 23, 2014
Sunday, November 16, 2014
Michigan Mid-November
What happened to October? And all my plans to have Gardens' hull painted before winter set in?
What happened was… Life. It seems that when I plan things, I don't take anything else into consideration. So, if ANYthing (anniversary trips, birthdays, etc.) outside of the plan arises, the plan takes a hit. I know better, too. I mean, one would think I'd allow some leeway in any plans I make but apparently I am a slow study.
And Winter happened. Sure, the calendar says it is still autumn but today's three inches of snow has "Winter" written all over it. The snow and steadily cooling (colding?) temperatures put an end to significant boat work in the barn until it warms up again. In the meantime I will bring supplies in from the barn and tidy up as best I can so the space will be ready at the earliest sign of spring. I can, and will, work on what I can in the shop until the bitter cold of January shuts me down there. Then I'll work on what I can in the basement. And, I will allow for Life when planning boat work.
Monday, October 27, 2014
Once Around the Sun… again…
Another trip around the sun completed today. It was a lovely day for boat work but Jan and I spent it collecting a nearly completed furniture project. We picked it up today because rain is in the forecast for next few days and we didn't want to dodge rainfall trying to get it home.

This is a chimney cupboard for my sister's country cottage. My brother-in-law did most of the work on this piece but I did learn a lot from watching and assisting (when possible). All it needs is a bit of sanding, paint and a few bits of hardware and it will be ready to deliver!
As for Gardens, I am still sanding, fairing and sanding - just not today. Not much to look at yet but painting will begin soon.
Wednesday, October 15, 2014
Step By Step... Slowly
Incremental - perhaps infinitesimal is more accurate - progress over the past week.
Working around cool days, I'm nearly done filling the weave of the FG cloth on the bottom. The stem and centerboard slot surrounds are installed but need glassing, sanding and fairing. Fairing of the hull is approaching that stage of, "just one more time…"
So, work continues at a slow pace but it is progressing. I wonder how long I can (should) wait before priming the hull?
Thursday, October 9, 2014
Surprise Results
While I've been figuring what I need to tent off the work area (how much plastic sheeting, lumber, etc), I've been doing a few bits of epoxy work with surprising results.
Temperatures in the barn have been in the mid-50s (outside temperatures in the upper 50s) when I filled a couple of spots between the sheer and adjoining planks. Twenty-four hours later (with an overnight low in the high 30s and outside temperatures again in the upper 50s) the epoxy was soft but not tacky. Eighteen hours after that, the epoxy appears to be cured. I'll let it sit for awhile longer before trying to sand it but I am pleasantly surprised by this result. >br>
The area needs some sort of enclosure and heat but I know work can continue until improvements to the space can be done.
Sunday, October 5, 2014
Alternatives?
The weather forecasts were wrong. Thursday and Friday were no better than last Wednesday. Neither were yesterday or today. The centerboard surrounds still need to be installed; the stem and surrounds need to be glassed; the weave of the glass on the bottom needs filling; and, of course, there is still a great deal of sanding and fairing to be done. Lows in the 30s with highs in the low 50s makes that epoxy work tough to do.
So, what are my alternatives?
So, what are my alternatives?
- Wait for warmer weather? That could be a long wait...
- Do the epoxy work and wait for it to cure - at least something would get done... eventually.
- Close in the area Gardens resides and use a space heater to warm the space to epoxy-friendly temperatures?
Wednesday, October 1, 2014
Cooling My Heels...
Yesterday was cold and rainy. So was this morning although the precipitation ended by mid-morning. This brief preview has me cooling my heels. Tomorrow and Friday ought to be warmer, allowing epoxy work to continue.
The stem is stalled at 5 plies and - based on test fitting of the centerboard slot surrounds this afternoon - may end there. No further cracking or splitting of the plies.
The centerboard slot surrounds will take five plies to match the the stem but they are short enough with little enough rocker so I should be able to install two plies at a time. The surrounds will be installed tomorrow and, maybe one more ply for the stem. After that, I'll round-over the stem and surrounds and fiber glass them to provide a measure of abrasion resistance.
Another thought… and I should direct this to John Welsford… what about a boom gallows? Located foreward of the mizzen and low enough not to interfere with the boom while sailing, a gallows could facilitate a boom tent and provide support for the spars while trailering. Just a thought… deserving further consideration.
Sunday, September 28, 2014
Laminating the Stem
Installing the exterior stem (laminating in place) began yesterday morning with the first ply (the plies for the lamination are pine ripped to between 4 and 5mm. No indication of stress, strain, cracking or splitting during the dry fit, so I painted the faying surfaces with neat epoxy, spread a generous amount of thickened epoxy on the hull and screwed the pieces into place. Then we left for a family get-together.

First thing this morning, I removed the screws, sanded the first ply and repeated the process to install the second ply - staggering the seams to avoid/minimize creating a weak spot.

Late this afternoon, I repeated the process again - and nearly got ahead of myself. I installed the skeg piece (which is almost flat and under no stress at all) without doing a dry fit. No problem. But I caught myself before getting too far along installing the stem piece without a dry fit. Good thing, too, because during that dry fit that ply (which measured 5mm) took the curve without any apparent problem but began cracking as I drove in the last screw (which was no where near the crack). Before I knew it, the piece split, held for a second or two and then broke in two.

I quickly removed the pieces, checked the next piece (closer to 4mm than 5mm) and proceeded with a dry fit. This time there was no cracking, splitting or breaking and the installation went well.

Three plies installed, three to go...
I am using 1¼" sheet-rock screws and plywood pads (souvenirs of my Goat Island Skiff build) which worked really well to hold the ply to the curve of the bow without marring the surface of the ply. Because of the total length needed (about 12ft) for the stem and (foreward) skeg, two pieces of unequal length are used for each ply so the seams can be staggered.
While this is a bit of a tedious process - I can add a maximum of two plies a day - the results will be good. And, there is no lack of work to be done before the hull is ready to paint...
Friday, September 26, 2014
Skeg, Stem and Fairing
Installed the skeg yesterday. Lots of thickened epoxy (too much, really, but I'd rather it be that way…), screws, patience and a huge assist from my wife.

Next up is the exterior stem and (for want of a better term) the foreword skeg (stem extension between the exterior stem and the centerboard slot?). Because my earlier lamination didn't fit well enough - and I dinged it up a bunch running it through the planer - I am going with Plan B. Plan B is laminating the exterior stem in place. The plies have been cut and the glue-up will begin in the morning. In the meantime, I glassed the front edge of the bow. The excess will be trimmed away before I begin laminating the stem.

Fairing continues - lots of sanding means lots of dust:

And, yes, I created more work for myself with that bit of fiber-glassing… But, it is all progress…
Wednesday, September 24, 2014
Things are Good
The bottom, including the first plank, has been glassed… and mostly sanded…
The first round of QuikFair has been applied…
The skeg has been epoxied and fiber-glassed and is ready for installation…
The temperatures reached the low 70s today… and, it didn't rain…
Things are that good!
The first round of QuikFair has been applied…
The skeg has been epoxied and fiber-glassed and is ready for installation…
The temperatures reached the low 70s today… and, it didn't rain…
Things are that good!
Sunday, September 21, 2014
On Track
Fiber-glassing the bottom is going well. The plan to have it done by today went by the wayside when Saturday's commitments made their presence known: an afternoon memorial service for a WWII veteran and an evening house concert in Grand Rapids. Why - or how - is it that known, scheduled events are completely forgotten when working on the boat?
Here's a couple of photos of the most recent piece of fiber-glassing… A before and an after:


Fiber-glassing doesn't look like much in a couple a snapshots but these photos document progress. The last bit of glassing involves a triangular piece on the bottom and separate pieces for the front end of the first plank. I'll cut those three pieces tomorrow (when today's epoxy isn't tacky) and epoxy them in place after fitting.
Fairing the hull will take a few days, I am sure. QuikFair's cure time allows multiple applications per day so I should be able to work nicely around a couple of appointments over the next few days.
While I lost a day of boat work to social activities - which were completely worthwhile - my time-line for getting the hull prepped and painted before the end of October is still good. Wiggle room was built in to the time-line.
Here's a couple of photos of the most recent piece of fiber-glassing… A before and an after:

Fiber-glassing doesn't look like much in a couple a snapshots but these photos document progress. The last bit of glassing involves a triangular piece on the bottom and separate pieces for the front end of the first plank. I'll cut those three pieces tomorrow (when today's epoxy isn't tacky) and epoxy them in place after fitting.
Fairing the hull will take a few days, I am sure. QuikFair's cure time allows multiple applications per day so I should be able to work nicely around a couple of appointments over the next few days.
While I lost a day of boat work to social activities - which were completely worthwhile - my time-line for getting the hull prepped and painted before the end of October is still good. Wiggle room was built in to the time-line.
Friday, September 19, 2014
Out of Chaos...
Tuesday's chaos gave way to a certain measure of progress over the last three days.
Half the bottom has been covered with fiber glass and epoxy. The rest of the bottom should be fiber glassed tomorrow - Sunday at the latest.
The second and third planks on each side have been epoxy-coated. Fairing of those will begin tomorrow. I am using System 3's Quik-Fair. I liked the small test sample I mixed and used on Wednesday so I am looking forward to fairing the hull.
The sheer strakes/planks need the trim strips fitted and installed before being epoxied, faired and prepped for paint. I had thought of using mahogany for the trim, but I am reconsidering that idea. Given the lengths, twists, bends and curves involved, my thought now is to laminate thinner, shorter lengths of Douglas fir (which I happen to have on hand) in place. I have to give that plan a bit more thought…
In addition to the physical progress of the last few days, I've got a workable timeline for getting the hull painted and turned right side up before it gets too cold to paint.
So, things are looking up!
Tuesday, September 16, 2014
Strange Day
It was - I was - unfocused. And that is being kind and generous. Bouncing from one thing to another but getting nothing accomplished - that was my day.
Early to bed, early to rise… and all that hopefully means I will be more focused tomorrow. Maybe... I will get something DONE!
Early to bed, early to rise… and all that hopefully means I will be more focused tomorrow. Maybe... I will get something DONE!
Sunday, September 14, 2014
Fitting the Skeg
Or… How to remove a bunch of material without making a lot of progress…
The skeg was rough cut to size and loosely fit to the hull a few weeks ago. There were a few high and low spots creating small (4 - 5mm) gaps in several places where the skeg didn't quite match the hull. Today, I decided to trim it to a nice tight fit…
I marked a line on each side of the skeg by sliding a carpenter's pencil along the bottom; there were some very minor differences. Using the grinder (with a flap-wheel sander) and the palm sander with 60 grit paper), I sanded to the lines and checked that the skeg was square. Put it back on the boat… There were a few - different - high and low spots putting the small gaps in different places.
Repeat the process - except to mark the low spots not the entire skeg. Similar results.
Repeat the process: same results although the gaps were getting smaller…
The whole process reminded me of efforts to even the legs of a chair to eliminate a wobble...
I stopped when there were only a few gaps and those gaps were no more than 2mm. I could have kept going to the point of sanding away much of the skeg but decided thickened epoxy, screws and glass-topped fillets will have to do.
Friday, September 12, 2014
Optical Illusion?
While tidying up the bottom edges of the planks, I spent some time trying to get a nice, sharp, crisp edge - because that's how I thought the edges should be… and struggled with the bumps and hollows. Then, while checking the Building Instructions for something else, I (re)read this:
Tidy up the underneath edges of the planking. This is critical to the boat's looks. Use a wooden batten around to indicate the bumps and hollows. Plane the edges fair with a rebate plane (or small block plane), fill the undersides and round them as shown on sheet 6. (emphasis added)
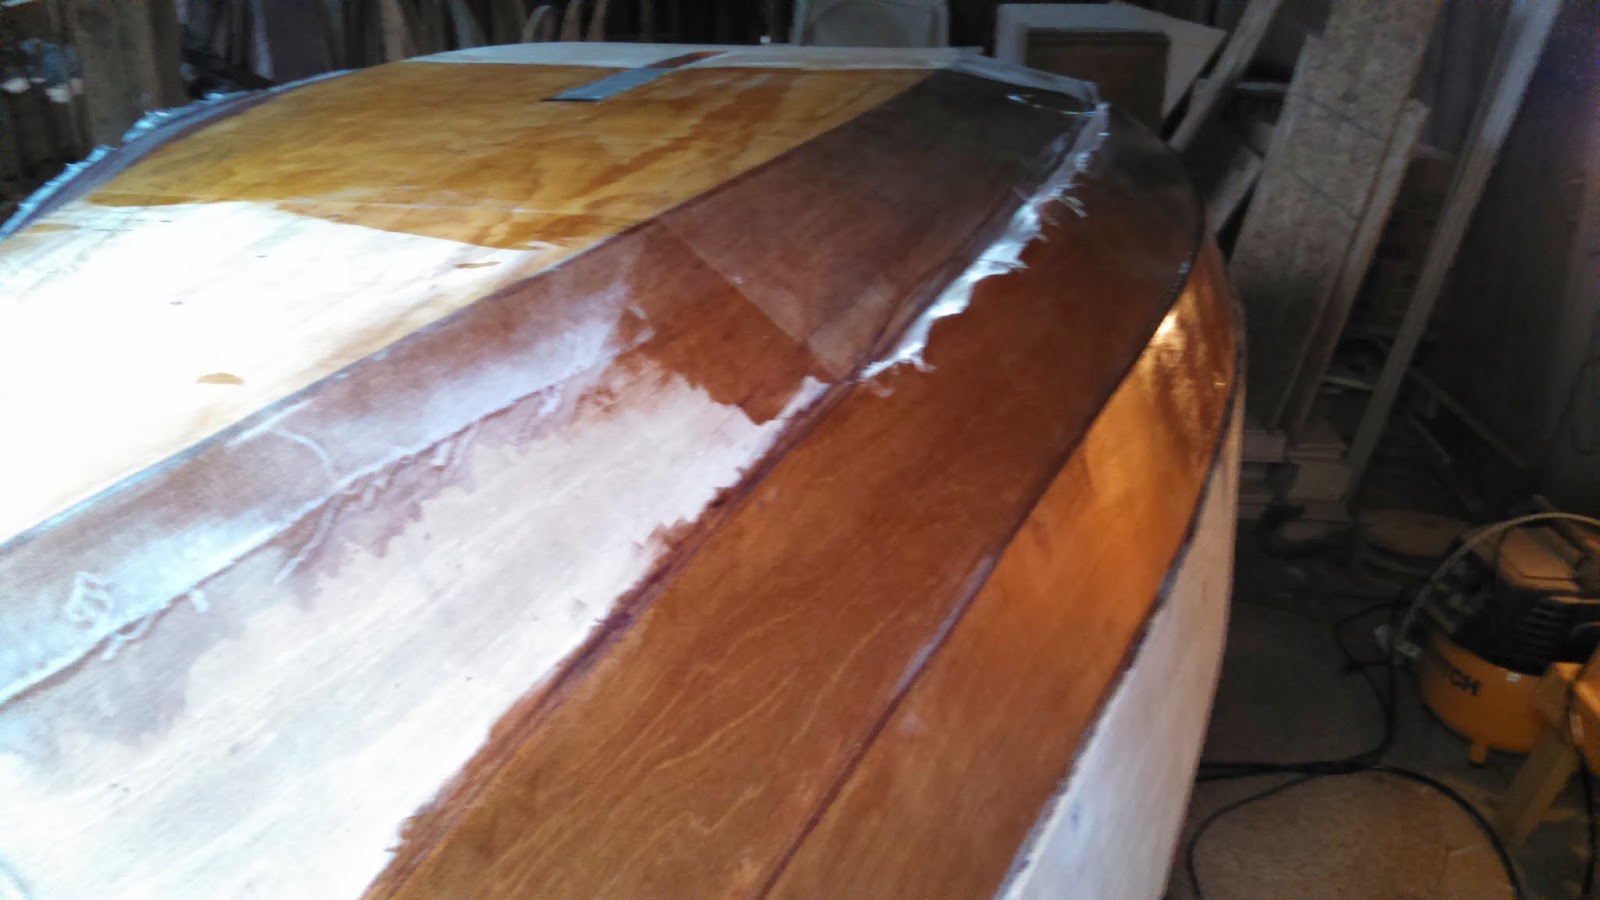
The wooden batten certainly helps but what surprised me most was that rounding over the edge made the the bumps and hollows visually disappear. This photo sequence illustrates this effect:
The raw edge:
Planed & Rough Sanded:
Rounded over:
Of course, there is more work to be done on the edges, but the modest statement, "This is critical to the boat's looks." is clearly an understatement. And rounding over the edge is a brilliant optical illusion - at least for me.
Tidy up the underneath edges of the planking. This is critical to the boat's looks. Use a wooden batten around to indicate the bumps and hollows. Plane the edges fair with a rebate plane (or small block plane), fill the undersides and round them as shown on sheet 6. (emphasis added)
The wooden batten certainly helps but what surprised me most was that rounding over the edge made the the bumps and hollows visually disappear. This photo sequence illustrates this effect:
The raw edge:

Planed & Rough Sanded:

Rounded over:

Of course, there is more work to be done on the edges, but the modest statement, "This is critical to the boat's looks." is clearly an understatement. And rounding over the edge is a brilliant optical illusion - at least for me.
Wednesday, September 10, 2014
Boat Hook Project
While waiting for epoxy to cure I have time to dream up new projects…
A couple of weeks ago I sat in Atlanta browsing DuckWorks' site and came across a bronze boat hook head fitting. That lead me to pricing boat hooks at Shaw & Tenney. THAT sent me back to DuckWorks… I decided to make my own and ordered a boat hook head fitting.
Here's a peek at the project:

The practice piece was tapered using a grinder with a flap-wheel, a belt sander and a palm sander. It took a bit of time but the taper is a good fit. I am hoping to do as well with the real handle.
The varnished piece is a cut-off from the 8' 1¼" square blank I glued up using old maple flooring. I planned to take the handle round, but I like the octagonal shape - it looks and feels good - so I decided to leave it 8-sided. The two coats of varnish on the test piece tell me I'm going to like the looks of the finished product.
Work on the hull continues albeit not as quickly as I hoped for... sanding, epoxy, fiber glass, fairing, sanding... all with the intent of getting the hull faired, primed and painted by November.
Sunday, September 7, 2014
Plank Gauge
I may be a slow study…
Eyeballing the planks to get them symmetric from side to side wasn't working too well for me. I can step back from one side to get a decent look but the other side is close in to a wall, limiting the visual perspective. And, even though I did some trimming and sanding, I wasn't very happy with the 'other' side. And, even I could see the planks were not symmetric (never mind that I could have cut the planks in pairs… ).
A friend of mine is fond of saying, "If you can't put a number to it, it's just voodoo." And that's what I felt I was doing - somehow, the planks would magically match up. So, how to put a number on them?
This is where I may be slower than some… It took me a while to figure out I could measure points on the planks on one side of the boat and transfer those points (measurements) to the other side, connect the dots and cut to that line.
So, a nice long straight edge, a carpenter's square and a ruler resulted in an impromptu plank gauge.

I marked off 12 stations along the centerline of the boat, drew perpendicular lines to the chines, placed the straight edge across at each station and measured to the 'top' of the plank, recorded the measurements and transferred to the other side. Masking tape 'connected the dots' and the multi-tool trimmed away the excess material. An assortment of sanders and rasps faired and smoothed the edges of the planks. Gardens is looking much better to me than she did earlier in the week.
Wednesday, September 3, 2014
Slathering Epoxy
Work on Gardens has resumed with the goal of getting the hull faired, primed and painted before the weather turns too cold for that sort of thing. So, I've got two and a half months (actually less than that now) before things get too cold in mid-November.
I've been fairing planks, finishing the glassing of the chines, fitting the skeg (rough cut done, now to sneak up on a good fit), fitting the stem (grinding the hull a little at a time to fit the laminated stem) and prepping to glass the bottom. Trying to decide whether to glass just the bottom or include that first plank… Either way, that will be a lot of epoxy to slather around.
No photos so far this week as there really hasn't been anything worthy of a photo… hopefully that will change soon!
Sunday, August 31, 2014
Back
Arrived back at the Farm today after being gone for 10 days visiting Atlanta. Two things about that city: it is too hot for me and it is far too crowded and congested for me (guess I'm not a city kid any more). Time to turn to on Gardens!
Tuesday, August 26, 2014
A Bit Outside the Box
John Vigor is well known to small boat sailors as a prolific writer whose works includes numerous books and the Non-Denominational Boat Denaming Ceremony. Mr. Vigor also writes a blog and his blog post yesterday Amateur Boatbuilders Can Do Better generated some spirited discussion on the DuckWorks FaceBook page.
Some thought Vigor's premises (amateur boatbuilders can do better than build simple/crude boats; amateur boatbuilders do this because they lack the confidence to build complex/fancy boats; amateur boatbuilders can produce professional-like results trading time for skill; simple/crude boats do not easily find new homes (limited resale value) are elitist and offensive. Some thought the simple/crude characterization of some designs meant boxy and ugly. Some thought those premises are spot-on in describing a general failure of amateur boatbuilders to live up to their potential; and thought these premises necessary for introspective analysis of (and by) the amateur boatbuilding community.
My initial reaction fell more or less with those who felt the remarks to be elitist. There was something a bit snarky about Vigor's remarks. There was a bit of defensiveness in me as I read the piece. After all, while I envision perfect joinery, what I see in my mind's eye just doesn't come out of my hands - and I am okay with that.
I could (and did in a hurriedly typed draft) take Vigor's premises apart one at a time, it seemed to me this morning that I had missed the boat, so to speak, about the post. I realized some people like to build - for them it is about the process of building a boat and these are the builders who turn out those impossibly-good-looking-works-of-art and craftsmanship. Some folks like building a boat and getting out on the water. These are the builders who turn out solid, functional, work-boat quality boats that get used - a lot. And, there are those whose interest is in getting out on the water as quickly as possible; their boats, while functional and well-used, often raise eyebrows (at the other end of the spectrum from the works-of-art boats). Nothing wrong with any of these folks or their approaches to building boats.
My impression this morning is that John Vigor is, however inelegantly, expressing his preference for high quality workmanship - which has little to do with how simple or complex a design may be. His use of simple/crude vs. complex/fancy designs confused the issue and was interpreted by some to mean ugly vs. pretty designs. But I do think he missed his mark by insisting that lack of self-confidence is the main (really the only factor he addresses) factor why amateur boatbuilders choose to build "simple/crude" designs instead of "complex/fancy" designs.
We all know our own limitations. We all push our own envelopes and are sometimes surprised with a new skill or a better-than-expected result. The Maid of Endor is a fine, complex and fancy design. I don't believe I am selling myself short by deciding not to build that, or any other, particular design. It is beyond my capacity to build but my self-confidence is not the limiting factor. Time, space and materials are greater limitations on my choice of designs to build.
Sure, amateur boatbuilders can do "better"… as can every doctor, lawyer, dishwasher, ditch-digger, hobbyist or professional - you name it - out there. But what is meant by "better"? As for introspective analysis, I think we all do that all the time, particularly when we are building on our boats.
Monday, August 25, 2014
On the Road Again
This morning finds us in Atlanta, GA - perhaps better referred to as Hotlanta - visiting with the three-month old twins - who have grown considerably since arriving in May. Good family times.
Of course, being here necessarily means Gardens is waiting patiently. The to-do list waiting for our return include:
In the meantime, we'll enjoy the grandchildren and complain about the heat and humidity in Hotlanta.
Of course, being here necessarily means Gardens is waiting patiently. The to-do list waiting for our return include:
- Stem, Skeg and Centerboard slot surround (fit and install)
- Hull work (Sanding, fairing and painting)
- Bottom work (FG, fairing and painting)
- Spars (milling BM staves, gluing, shaping and varnishing)
In the meantime, we'll enjoy the grandchildren and complain about the heat and humidity in Hotlanta.
Wednesday, August 13, 2014
It Should Come As No Surprise...
And yet, I was surprised, impressed and pleased after installing new blades in the Ryobi thickness planer. I swear it even sounds different - better - than it did with the old (and visibly dull) blades. Don't know if that is even possible but it seems that way to me.
Gardens scored a new outboard motor mount late this afternoon! Timing is everything: DuckWorks posted on FB they received a couple of the previously out of stock Race-Lite Motor Mounts and updated the post to say there was only one left. I grabbed my Mac and wallet and placed my order. DuckWorks sent a confirmation email and Chuck's subsequent post confirmed the purchase.
Gardens scored a new outboard motor mount late this afternoon! Timing is everything: DuckWorks posted on FB they received a couple of the previously out of stock Race-Lite Motor Mounts and updated the post to say there was only one left. I grabbed my Mac and wallet and placed my order. DuckWorks sent a confirmation email and Chuck's subsequent post confirmed the purchase.
Monday, August 11, 2014
Odds & Ends
Travel (Cleveland, Fremont, Ann Arbor, Chicago, Atlanta, Oklahoma, Duluth and Denver) is picking up which means boat work is necessarily slowing down. And we haven't been able to do all the traveling we planned this summer: We missed the sailing vacation to the Upper Peninsula. Progress comes in fits and starts between trips but there is progress.
And, even though it is August - with warm temperatures and high humidity - I know cold winter weather is lurking on the horizon. So, there is motivation to get as much done before temperatures drop too low for epoxy and paint. As the saying goes, I'll have to make hay while the sun shines…
There are two thickness planers in my shop. One is a basic Ryobi I bought used three years ago. It has served me well but it needs new blades - or it needs the existing (two-sided) blades changed around - and a good cleaning. New blades have been ordered and I will check the existing blades before installing the new ones. The other planer is a Delta planer with more bells and whistles than the Ryobi but the lifting mechanism is stuck (the planer sat in the barn for at least four years before I found it last fall). No amount of penetrating oil and leverage has budged it. The plan is too take it apart, figure out why it is stuck, correct it and reassemble the planer. One hesitation is, how do I get it properly aligned when reassembling it? Then it occurred to me, the planer is useless now so I can't make it worse... That little project may wait until that cold winter weather shows up later in the year.
Having completed this year's Pedal to the Point bicycle ride, my brother and I decided we want to do the Courage Classic, a three-day event, in Colorado next July. So, now I need to figure out how to train for the hills/mountains and altitude of Colorado here in the flat lands of Michigan. I need to get cracking on that as the Courage Classic is only 48 weeks away...
Travel, boat work, wood work, tool maintenance and bicycle training... plenty of odds and ends to keep me busy!
Monday, August 4, 2014
Pedal to the Point - Done!
This year's Pedal to the Point bicycle ride is history. 72 miles on Saturday and 61 miles (because my legs of lead gave up 10 miles from the finish) on Sunday. I'm a bit stiff and sore this morning but that will soon pass. I know that had I trained more/better for the event I could have finished Sunday's route. I'll have to keep that in mind as I prepare for a three-day event in Colorado next July!
One boat task begun before I left for Ohio: fitting the external stem with some sanding (maybe grinding is a better term as I used my 4½" grinder) of the bow of the hull. I'll finish the fitting when I get back tomorrow.
One boat task begun before I left for Ohio: fitting the external stem with some sanding (maybe grinding is a better term as I used my 4½" grinder) of the bow of the hull. I'll finish the fitting when I get back tomorrow.
Wednesday, July 30, 2014
Off the Jig
The laminated outer stem came off the jig with surprisingly little spring-back. It isn't a perfect fit on the hull but it will only take a bit of sanding for it to be so.
Still prepping for the two-day Pedal to the Point bicycle ride this weekend: 75 miles, Cleveland to Sandusky on Saturday; returning 75 miles on Sunday. I'm looking forward to it!
Still prepping for the two-day Pedal to the Point bicycle ride this weekend: 75 miles, Cleveland to Sandusky on Saturday; returning 75 miles on Sunday. I'm looking forward to it!
Sunday, July 27, 2014
Laminating the Stem
The stem - or, more succinctly, the outer stem - came together rather suddenly yesterday. I spent a couple of hours over last week re-sawing and planing four 1x4s into nine useable 3.5mm thick pieces for the lamination.
And, I watched this series of videos on Laminating the Stem several times. The video answered a basic question I had: How do you glue up so many pieces with all those clamps in the way? (Somewhere I got the notion that the individual pieces were added to the form one at a time…)
So, after applying a finish to a couple of picture frames and a bit of work on the chine, I found myself with time, the stem pieces and no excuses... I decided there's no time like the here and now to glue up the stem.
Following the general guidelines (but not all of the specifics - ( I used waxed paper rather than plastic under the glue-up), the gluing, assembly and clamping went remarkably well. The only real "mix-up" (literally) came when I tried to mix a batch of epoxy that exceeded my scale's capacity and I lost track of the mix. I set that aside and continued on. Later in the day that unused batch had set up nicely - I could have used it but there was no way to know that at the time.
The stem is all clamped up, the epoxy is doing its thing and I plan to leave it in the form for a few days.

In the meantime, work continues on the bottom, planks, spars (and other woodworking projects).
Thursday, July 24, 2014
Working on the Bottom
A long, long time ago - or so it seems - when I cut the slot for the centerboard trunk, I cut it a bit too long. There has been a small gap (hole) in the bottom just aft end of the centerboard trunk. Not really a big deal and I figured I would repair it when I turned the boat over to work on the bottom. Well, here we are… Gardens has been upside down for about three weeks and that gap/hole is still there…

I fashioned a plug out of Douglas fir, fit it and glued it in place today.

Not sure why the lighting is so different in these photos - they were taken just minutes apart. The plug stands proud of the bottom which allows me to sand/grind it flush with the bottom (I'd rather do that than try to fill it in if the plug was below the bottom). There will be some additional work to finish the repair when I build out the interior but nothing major.
The gap between the bottom and the port-side garboard has been filled and covered with two layers of FG (4" tape overlapped with 6" tape).
Work continues on matching the starboard planks to the port-side planks, filling the fastener holes in the bottom and laminating an external stem.
Sunday, July 20, 2014
Upcoming Events
There are two noteworthy small-boat events on my horizon.
The last weekend in September, a Gathering of Goats will take place at Seneca Lake, New York. Seneca Lake was chosen as the site based on the (relatively) high concentration of GIS in the Northeast. This event may be of limited interest to the small-boat world in general but to the small cohort of GIS builders/owners/sailors, it will be a significant outing. All Goat Island Skiffs (GIS) are invited and if more than three show up, it will be the largest known gathering of GIS so far. Details can be found on Facebook (look for the Goat Island Skiff group). We are still checking our calendar and figuring out if we can make it to the Gathering.
This year's Sail Oklahoma event takes place October 9-13. Headquartered at the Monies' Boat Palace near the shores of Lake Eufala, Sail Oklahoma has grown into, perhaps, the preeminent small-boat messabout in the country. The event is packed with seminars, demos, sailing (and rowing, paddling, and power boats, too), music, great food (Cowboy Cookies alone are worth the trip), lots of boats, lots of people and an all-star line-up of designers and builders. Sail Oklahoma is on our calendar.
A third, and much smaller, messabout is a possibility for us in August in McKay Bay in Les Cheneaux Islands on Michigan's Upper Penisula. A Picnic Cat 15 (my sister and brother-in-law) and a Potter 19 (cousins) are committed to the trip. We plan to go for a least a visit, and, if the trailer can be prepped for the trip, may take Karen Ann, our GIS. Three boats would definitely be more fun than two!
Meanwhile, work continues on Gardens...
Wednesday, July 16, 2014
Boat Work, Wood Work and Riding
UPS Freight delivered the new table saw, a Grizzly G0715P, last Wednesday afternoon. We transferred it from the truck to our utility trailer and, from there, to the shop floor. Set up took a couple of hours - including reassembling the mobile base a couple of times before we got the casters installed properly.
The saw is an impressive machine. And the accuracy, right out of the box, is impressive, too.
The major drawback to having a new saw is finding enough time each day to work on Gardens, do some woodworking in the shop and putting in some miles on my bicycle. That last is important as I am gearing up for a two-day, 150-mile ride in about two weeks - and I haven't ridden nearly enough this spring and summer. More time in a day would be nice, but we all get the same 24 hours each day. Hopefully, a workable routine will soon evolve…
In the meantime, progress continues with fairing the strakes. Why does a task always seem to take longer to complete than I think/wish/hope it should?
Saturday, July 12, 2014
Fairing the Planks
I began fairing the planks this week.
Without having a 20' batten, or the means to make one, I am using masking tape to line off each plank. It is a bit tedious to place the tape, step back for a look, adjust the tape, look again, and so forth until getting what appears to me (and I hope) is a fair line. But, it is what I have to work with and, so far, I am pleased with the results.
Using a multi-tool, block plane, a palm sander and a sanding block I trimmed two planks on the port side to the tape. The third plank will be masked off and trimmed tomorrow.

The measurements of the port side planks will be transferred to the starboard side planks, which should be trimmed to shape Monday and Tuesday.
The butt seams are being filled and faired as are the chines (the seam between the bottom and the garboard plank). Once the chines are filled and faired, the bottom will be ready for epoxy and fiber glass cloth… maybe by the middle of next week.
My new table saw arrived on Wednesday. It has been set up and works beautifully.
Tuesday, July 8, 2014
It's a Wooden Boat...
We often hear - and share - the refrain, "It's a wooden boat, it can be fixed" without really appreciating that fact.
Today, I had that lesson driven home…
When I planked Gardens I struggled with the garboards, particularly at the bow and especially on the starboard side. I knew there was a problem but didn't fully appreciate it until we turned Gardens over last weekend.
There was a gap - not a sliver of light shining through but a legitimate GAP (wide enough to drive the proverbial truck through) where the starboard garboard did NOT pull tight against the stem/spine. The problem is visible (sort of) in this view of the overturned hull:

While that photo doesn't show the gap, rest assured the gap is (was) located at the hump. No, I don't believe that hump (a mis-cut of the plank) caused the gap, the hump just marked the gap's location.
A flap-sander on a grinder took car of the hump. A plug, fashioned of cut-offs and epoxy, filled the gap. The repair is visible in this view (albeit a bit out of focus):

So, my stewing and fretting about the gap over the last few days was unnecessary. I have a new appreciation for the adage, "It's a wooden boat, it can be fixed."
Saturday, July 5, 2014
Done! Done! Waiting...
The new-to-me band saw came home yesterday and, with some help, is now in the shop!

Done!
Gardens went from this:

and this:

To this:

Five adults and two 2x3x8' studs (slipped under the hull) had Gardens off her trailer, on the ground, rolled over and on the stands in about five minutes!
Done!
Getting Gardens rolled over feels great - lots to do but there it is right in front of me to do!
UPS Freight called on Thursday to schedule the delivery of the table saw next Wednesday afternoon.
Waiting…

Done!
Gardens went from this:

and this:

To this:

Five adults and two 2x3x8' studs (slipped under the hull) had Gardens off her trailer, on the ground, rolled over and on the stands in about five minutes!
Done!
Getting Gardens rolled over feels great - lots to do but there it is right in front of me to do!
UPS Freight called on Thursday to schedule the delivery of the table saw next Wednesday afternoon.
Waiting…
Tuesday, July 1, 2014
Waiting for Tools
My new-to-me band saw is ready to be picked up this week. It will probably have to come home in two trips as the Escape is not large enough to hold the saw and stand.
The brand new table saw will be here next week! That means I need to de-clutter the shop to make room for the new saw. How is it that a new space can become so cluttered in such a short time?
While waiting for the saws, I have been busy figuring out how to build a layout table for laminating the stem; and, not so coincidentally, where to put the layout table. Checking the barn for what might be useful (my new "first step" for projects), I found another 4x8 sheet of chipboard, two 2x10x10 planks (previously used in my spar table) and two idle sawhorses. An "instant" table:

photo 408
I'll plot the points defining the shape of the bow on the table, secure blocks at those points and proceed with laminating the stem. Of course, I need to find the lumber for the stem and mill it to a workable size. I haven't seen anything in the barn as yet that is long enough (and not peppered with old, rusty nails) but there may be something out there. Otherwise, I'll have to visit the lumber yard for new material.
In quasi-boat related news, the Escape gets a tow hitch and wiring installed tomorrow. I'm still looking for a trailer for Gardens.
In totally non-boat related news, we had a great time attending a Bonnie Raitt concert last night at the Interlochen Center for the Arts. She and her band have a genuinely good time playing their music and their audiences have a great time watching and listening.
The brand new table saw will be here next week! That means I need to de-clutter the shop to make room for the new saw. How is it that a new space can become so cluttered in such a short time?
While waiting for the saws, I have been busy figuring out how to build a layout table for laminating the stem; and, not so coincidentally, where to put the layout table. Checking the barn for what might be useful (my new "first step" for projects), I found another 4x8 sheet of chipboard, two 2x10x10 planks (previously used in my spar table) and two idle sawhorses. An "instant" table:

photo 408

I'll plot the points defining the shape of the bow on the table, secure blocks at those points and proceed with laminating the stem. Of course, I need to find the lumber for the stem and mill it to a workable size. I haven't seen anything in the barn as yet that is long enough (and not peppered with old, rusty nails) but there may be something out there. Otherwise, I'll have to visit the lumber yard for new material.
In quasi-boat related news, the Escape gets a tow hitch and wiring installed tomorrow. I'm still looking for a trailer for Gardens.
In totally non-boat related news, we had a great time attending a Bonnie Raitt concert last night at the Interlochen Center for the Arts. She and her band have a genuinely good time playing their music and their audiences have a great time watching and listening.
Thursday, June 26, 2014
Back to the Shop
We're back from our West Coast adventure. Highlights and points of interest included Sacramento, Calaveras Big Trees State Park, part of the California Delta and Costco!
It felt good to be back in the shop today. I used a small, old, portable table saw and the thickness planer to mill the bottom piece for the skeg.

The skeg blank was then glued up.

Cutting the blank to shape and trimming it to fit the bottom of the hull will wait until Gardens is turned over.
Using the small, old, portable table-saw was fine for today's purposes but served as a reminder that I want to order my new saw soon. After shopping around (on-line, at Woodcraft and Rockler), reading reviews (Jet, SawStop, Grizzly and Shop Fox), using a Jet saw (don't know anyone close by with any of the other saws) and comparing features and costs, I've decided on the Grizzly G0515P.

In other news… Gardens of Fenwick, the blog, logged a pair of milestones early this week: The number of posts reached 150 and the page-views surpassed 25,000 (hard to believe, really)!
I'll be home now for about six weeks before our next travels. Hopefully, there will be more progress on Gardens and in the shop.
Sunday, June 22, 2014
Travelogue... Big Trees
After a slow morning - yesterday's wedding reception was most memorable - we headed to Calaveras Big Trees State Park. Yes, this is still one of my favorite places on earth…


These photos don't even begin to convey the beauty and majesty of the park. There is no way to capture the sights, the sounds, the smells or the feeling of the cool mountain air on your skin.
Guess we'll have to go back another time or two…


These photos don't even begin to convey the beauty and majesty of the park. There is no way to capture the sights, the sounds, the smells or the feeling of the cool mountain air on your skin.
Guess we'll have to go back another time or two…
Saturday, June 21, 2014
Away From the Shop... Traveling
I'm away from the shop for a few days as we are in N. California for my son's wedding today. He and his partner had the wisdom to have their wedding in Arnold, California - which just happens to be near one of my favorite places on the planet. Calaveras Big Trees State Park is just a couple miles up the road from us. Tomorrow, after today's celebration, Jan and I will immerse ourselves in the beauty and splendor of the Big Trees. Hopefully, I'll have some photos of these ancient and magnificent trees to share tomorrow.
Sunday, June 15, 2014
Shop Space and Casters
No white oak to be found in the barn, so the skeg is getting a bottom piece of the same pine as the rest of it. The bottom piece has been cleaned but needs to be ripped to the correct width, which will have to wait a bit until I have access to a tablesaw at the end of the month.
A full-size pattern for the skeg has been "lofted" onto foam-core and cut out.
The new shop is evolving as I learn to dance the tools around the space figuring out what works well amd what doesn't. I am learning to be flexible with the shop layout. Thank goodness for casters.
Wednesday, June 11, 2014
Skeg Assembly... Delayed...
Yesterday, I cleaned up the oak 2x4s intended for the bottom of the skeg. Nice, good looking wood…

Nice, good looking red oak… but not suitable for the skeg - or any other part of a boat. So, subsequent work on the skeg will wait until I check the cache of wood in the back of the barn. As for the red oak, I'll use it in an upcoming non-boat related woodworking project.

Nice, good looking red oak… but not suitable for the skeg - or any other part of a boat. So, subsequent work on the skeg will wait until I check the cache of wood in the back of the barn. As for the red oak, I'll use it in an upcoming non-boat related woodworking project.
Sunday, June 8, 2014
Skeg Fabrication: Milling and Lamination
So, with the shop semi-functional, I got to work on the skeg. The skeg measures (approximately) 1720mm (67") long; 165mm (6½") at its widest/deepest point; and 70mm (2¾") thick. To create a blank measuring 70mm x 165mm x 1828mm (72" allowing for further cutting to size, I started with two rough-cut pine (species unknown - this is old wood that came from an old Michigan farmhouse) boards measuring 50mm (2") x 152mm (6")x 2140mm (84"). These boards were used to support lath & plaster walls so there were multiple shallow, small nail holes in the faces of the boards when I began to work the lumber.

These were milled with a thickness planer to 35mm (about 1 3/8") x 146mm (5¾"). This removed many, but not all, of the nail holes. The boards were then cut down to 1828mm (72") for gluing.


The boards were laminated using epoxy: a coat of neat epoxy on both boards, thickened epoxy lathered on one board, and then clamped together.

Once the lamination is cured, I will square up the edges and glue a hardwood shoe - maybe that's not the correct terminology - on what will be the lower edge. (Maybe it is a sub-skeg?) I have some found oak 2x4s that I plan to mill to fit the blank and form the lower edge of the skeg. After cleaning up one of those 2x4s, I think it might be quarter-sawn oak… If it is, I'll find different hardwood for the skeg and use the quarter-sawn oak for something that will be a bit more visible.
Once the blank is complete, I'll make a pattern, rough-cut the skeg to shape and work to fill and fair any remaining small, shallow nail holes. I'll fine tune the fit when it is time to install the skeg.
Saturday, June 7, 2014
Tools in the Shop...

…sawdust on the floor...

…and chaos reigns!
Sure, I planned to have everything organized and in its place before starting to use the shop… right…
Order will follow in due course, but I'm enjoying the space already.
Monday, June 2, 2014
Miscellaneous Odds & Ends
Well, okay, I guess "Miscellaneous Odds & Ends" is a bit redundant but, here we go:
- Shop Space:
- Floor: The floor is done but for trim/baseboards. It looks good and feels very solid. I am happy with it.
- Work Benches: I know what I want to install and have a materials list ready to go. Tomorrow I'll see what's in the barn that I can use but I know I'll have to use some store-bought materials.
- Tools: Now that I have the space, I'll begin filling it up… Almost everything will be on castors so they can be easily moved about.
- Dust Collecter
- Drum Sander
- Router Table
- Spindle Sander
- Band Saws (yep, two: my old 12" Craftsman and my new-to-me 14" General Industries model)
- Thickness Planer
- Table Saw - that will come later this summer
- Skeg: I took measurements off a drawing and will begin milling the skeg as soon as the tools are set up.
- Spars: The wood is waiting… once the tools are set up, I'll begin with the yard.
- Color Schemes: After reading about Rik's digital color scheme sampling and receiving a color card from Kirby's Marine Paints, we've decided to do our own sampling. We'll download the line drawing of the Pathfinder and experiment with different colors schemes.
- Inspiration: I finally began reading The Dinghy Cruising Companion by Roger Barnes and, I must say, it makes me want to get Gardens done and outfitted so we can go sailing! (Of course we can take Karen Ann sailing… but Gardens…)
Thursday, May 29, 2014
New Shop Space
Spent yesterday and today building a new deck-floor for the Shop. And... I'll spend tomorrow finishing up - I ran out of steam this afternoon. The update is posted to The Shop page.
Wednesday, May 28, 2014
Skeg Timbers and Other Materials
I found an old 17' length of 2x6, which really does measure a full 2" x 6", in the potting shed and figured it could be cut down and used to fashion the skeg. The fact that it is old and has numerous nails sticking out of it wasn't a concern - until today.

Those old nails (there are about 30 of them in the board) are not coming out of this old wood without a higher power of persuasion than I can muster. Cutting the nails out pretty much destroys the board - at least as far as using any part of it for the keg.
But, that cache of timbers I found a couple weeks ago is even better than I first thought. There are white oak 2x4s (actually measuring 1¾" x 4¼") ranging from 5' long to nearly 9' long. There are pine timbers, 1¾" x 4", and nearly 8' long. There are three 20' long 2x6 (not old, dimensional) boards (could be a mast in there…) Other shorter, pieces - some nearly 12" wide and better than an inch thick - may not be useful for Gardens but could certainly find new life in other projects.
Sunday, May 25, 2014
Looking Ahead to August
Okay, so the marathon won't be finished this year. But, there are sailing plans afoot which will provide interesting comparisons of three different boats and motivation to complete Gardens.
The first two weeks of August will see my sister and her husband taking their ComPac PicNic Cat, WildCat, to McKay Bay in Les Cheneaux Islands in Michigan's Upper Peninsula at the top of Lake Michigan. Joining them will be our cousins from Austin, Texas bringing their Potter 19(name unknown). We will join them with Karen Ann, our Goat Island Skiff.
While no one admits to being competitive, we all are… so there will be some spirited sailing. The GIS, generally speaking, sails away from the PicNic Cat in most conditions but I must admit that I favor lighter air (in which Karen Ann excels and WildCat does not). In heavier conditions, I am less comfortable with the Goat (hence Gardens) and WildCat handles stronger winds better than I do. The Potter 19 will probably outsail WildCat in all conditions but light air should, again, favor our Karen Ann. We'll see…
Sailing in McKay Bay, August 2013:
In the meantime, I will be working diligently on Gardens so that next year we'll be ready for the McKay Bay outing and other adventures. I'll also check Karen Ann for any maintenance, cosmetic or refitting needed to take her sailing.
The first two weeks of August will see my sister and her husband taking their ComPac PicNic Cat, WildCat, to McKay Bay in Les Cheneaux Islands in Michigan's Upper Peninsula at the top of Lake Michigan. Joining them will be our cousins from Austin, Texas bringing their Potter 19(name unknown). We will join them with Karen Ann, our Goat Island Skiff.
While no one admits to being competitive, we all are… so there will be some spirited sailing. The GIS, generally speaking, sails away from the PicNic Cat in most conditions but I must admit that I favor lighter air (in which Karen Ann excels and WildCat does not). In heavier conditions, I am less comfortable with the Goat (hence Gardens) and WildCat handles stronger winds better than I do. The Potter 19 will probably outsail WildCat in all conditions but light air should, again, favor our Karen Ann. We'll see…
Sailing in McKay Bay, August 2013:

In the meantime, I will be working diligently on Gardens so that next year we'll be ready for the McKay Bay outing and other adventures. I'll also check Karen Ann for any maintenance, cosmetic or refitting needed to take her sailing.
Wednesday, May 21, 2014
From A Sprint To A Marathon
When I began building Gardens in the late fall of 2011, I had great plans and expectations of completing and launching her in the Spring of 2013.
Then a funny thing happened in February 2012. Oh, not funny "Ha-Ha" or even funny "Peculiar" - just funny as in an unexpected turn of events…
I attended Sail Havasu that February - and learned a great lesson in humility - but that wasn't the funny thing. When I returned to Michigan I resumed volunteering in the local Food Kitchen. While prepping the noon meal, the leader of the group asked, "Bob, have you met Jan?" And that was IT… even though we didn't realize it was so that day, that was the day the "funny thing" began. We've been together ever since.
So, what does all this have to do with boat building? Life is so dynamic that a small change here or a funny little thing there has a great impact on everything else, including plans and expectations. That February meeting, although we didn't recognize it at the time, changed building Gardens from a sprint into a marathon. And I don't regret it at all.
Looking back on earlier posts, I realize I have been busy getting ready to do this or do that but precious little actual boat building. While family affairs continue to arise - and we'll be traveling a good bit more this summer - I am content to experience life and work on Gardens when I can. Late this summer and into the fall, Gardens will progress toward completion with an eye to launching in the spring of 2015.
Sunday, May 18, 2014
Distractions
These distractions are the good kind…
Twin grandchildren (a girl and a boy) arrived this week! All fingers and toes accounted for and everyone is healthy.
A 2011 Ford Escape has replaced the 1990 Volvo wagon as my everyday, utility and tow vehicle. The Volvo is a classic but the Ford should be a bit more reliable - it is certainly more comfortable.
Building out the shop (not really a distraction) is progressing. The space is nearly empty - and will be before the sand/gravel fill arrives to level out the floor. I discovered another cache of old wood in the barn, too!
Michigan weather is warming - be it ever so slowly - and it won't be long before I can work with epoxy in the barn! While serious boat building work has not yet resumed, the pieces are falling into place and I can see progress on the horizon...
Wednesday, May 14, 2014
Modified Bird's Mouth Method
Thanks to Joel's comment last week referring me to the Modified Bird's Mouth Method, I looked it up on Duckworks. The modification involves cutting the V-notch a little differently: the notch is cut so the corner of the next stave nests flush with the upper tip of the V (placing the point of the V below the center of the stave). This minor change results in less waste and a thicker wall for the spar. These results are clearly illustrated in the article.
I plan to use the Modified Bird's Mouth Method when I mill, assemble and shape the spars for Gardens. Unfortunately, beginning the spars will be delayed until after Memorial Day as we have some (good) family business to attend to (and I will not have much time for boat building or wood working.) It sure seems to be taking a long time for me to get to these spars...
I plan to use the Modified Bird's Mouth Method when I mill, assemble and shape the spars for Gardens. Unfortunately, beginning the spars will be delayed until after Memorial Day as we have some (good) family business to attend to (and I will not have much time for boat building or wood working.) It sure seems to be taking a long time for me to get to these spars...
Wednesday, May 7, 2014
Yard Mock-Up
Clean-up of the soon-to-be shop space is proceeding…
In the meantime, the router table and drum sander have found a home in the garage.

Since I can't be cleaning all the time, I decided to build a mock-up of the yard (sort of practice for the yard, boom and masts to be built for real…). The staves for the yard measure 10mm x 16mm (about 3/8" x 5/8") - so I figured a practice round was a good idea to see how these small pieces would work. I rough cut the staves to 15mm x 19mm and ran them through the drum sander to sneak up on the finished dimensions. What I learned is that I can cut them closer to the final dimensions and save some time on the sander. The staves were then notched on the router table. Gluing these small staves was actually easier than I expected it to be - but I'm still wondering about gluing such small cross-section pieces that will be 12' long.

The plug came home from the store as a 1" x 1" square dowel (hey, that's what they call them at the store…), which wasn't quite square, measuring 24mm x 25mm.

A few passes through the drum sander squared up the dowel at 23mm. Then, using a chamfer bit in the router table, I milled the square dowel to an octagonal plug.

The plug fits the hollow in the spar section with a small gap between the walls of the spar and the plug. Thickened epoxy will fill the gap.

Today's experiment showed me that the small cross-section of the yard staves is not a problem and work can begin on the yard.
Sunday, May 4, 2014
Time (finally!) To Get Busy
With the weather (slowly) improving, the list of things to do is getting longer:


 to a functioning shop... soon...
Time to get busy!
to a functioning shop... soon...
Time to get busy!
- Set up to turn Gardens
- Lifting system (similar to Rik's)
- Building platform (something to support the hull once it is turned)
- Spars
- Mill staves for mizzen mast, main yard and boom (band saw & drum sander)
- Notch staves (router table)
- Glue/Assemble (temporary spar bench)
- Plane & sand to shape
- Shop Set-Up: From this…


Subscribe to:
Posts (Atom)