The Oregon trip went well. Spent good time with grandchildren, made a great start on the kayak project with my son, and got to visit with my other two children before returning to Michigan and Gardens.
Today was a 'travel recovery' day - unpacking, catching up with Jan, napping and generally taking it easy. Didn't even go out to the shop to see what's what.
Tomorrow soon enough.
Sunday, November 19, 2017

Tuesday, November 14, 2017
Change of Venue, Different Boat, Next Generation, New Skills
Based on some discussions with my son in August, we decided to build a skin-on-frame kayak. We picked Dave Gentry's Chuckanut 12s - a 12' stretch version of the Chuckanut 10 design.
So, here I am in Klamath Falls, Oregon for a 10-day build session. I arrived last Tuesday and we cleared out a space in the garage, ran some errands, bought some materials and supplies before beginning the actual work on the kayak on Friday.
Scott cutting stock for the chines and gunnels. Photo
Scott planing stock for the scarf joints. Photo
Gluing two chines at a time Photo
About half of the chines Photo
Strong-back, Frames 1 and 5, keel, and gunnels loosely tied in place Photo
Bow stem Photo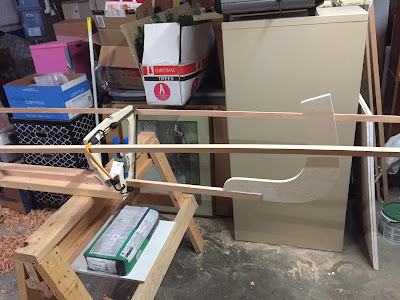
Improving shape with Frame 3 loosely in place Photo
Two more frames to cut out and fit, which will further improve the shape. Twist resulting from being "loosely tied" will be taken out when we lash the fuselage together.
This project is an opportunity for Scott and I to work on a project together (tough to do when we live so far apart). I am hoping to pass some woodworking skills on to him - and he is doing quite well with the block and smoothing planes.
Work on Gardens will resume when I return to Michigan this coming weekend.
So, here I am in Klamath Falls, Oregon for a 10-day build session. I arrived last Tuesday and we cleared out a space in the garage, ran some errands, bought some materials and supplies before beginning the actual work on the kayak on Friday.
Scott cutting stock for the chines and gunnels. Photo

Scott planing stock for the scarf joints. Photo

Gluing two chines at a time Photo

About half of the chines Photo

Strong-back, Frames 1 and 5, keel, and gunnels loosely tied in place Photo

Bow stem Photo

Improving shape with Frame 3 loosely in place Photo

Two more frames to cut out and fit, which will further improve the shape. Twist resulting from being "loosely tied" will be taken out when we lash the fuselage together.
This project is an opportunity for Scott and I to work on a project together (tough to do when we live so far apart). I am hoping to pass some woodworking skills on to him - and he is doing quite well with the block and smoothing planes.
Work on Gardens will resume when I return to Michigan this coming weekend.
Sunday, November 5, 2017
Mast Caps and and a Collar
Gardens' masts will sport caps, primarily as a decorative touch but also to better protect the wood end-grain at the top of each mast. The mizzenmast gets a collar, too. The caps are CVG DF and the collar for the mizzenmast is mahogany. A (rough) photo-essay of the process I used in creating the caps and the collar follows:
Eight segments with each end cut (on the table saw with a miter gauge) at 22.5°.
(Different) Segments assembled, glued (with thickened epoxy), and clamped.
Octagon blank ready for drilling (inside diameter begun), cutting (outside diameter), and sanding (all surfaces).
Top and bottom pieces of cap glued together with top piece cut/sanded to match outside diameter of bottom piece (could have used another photo or two here).

Top of cap will be sanded to "domish"/round-over shape. This is a practice piece.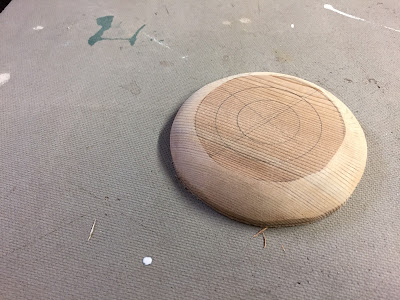
Collar for the mizzenmast.
Collar and its base. The underside of the base is contoured to fit the aft deck.
Eight segments with each end cut (on the table saw with a miter gauge) at 22.5°.

(Different) Segments assembled, glued (with thickened epoxy), and clamped.

Octagon blank ready for drilling (inside diameter begun), cutting (outside diameter), and sanding (all surfaces).

Top and bottom pieces of cap glued together with top piece cut/sanded to match outside diameter of bottom piece (could have used another photo or two here).


Top of cap will be sanded to "domish"/round-over shape. This is a practice piece.

Collar for the mizzenmast.

Collar and its base. The underside of the base is contoured to fit the aft deck.

Tuesday, October 31, 2017
Slot and Plug/Cap
The concept for the Slot, to facilitate mast raising, came to me a year-and-a-half ago. The idea of the Plug, to fill the slot and hold the mast upright, was part of the original concept. How to hold the Plug in place took a while to figure out. Here's what I came up with:
Slot: Slot with Demo Mast:
 View of underside of Plug/Cap with turn-buttons lined up fore-n-aft:
 View of underside of Plug/Cap with turn-buttons athwartship:
 Plug/Cap in place:
 Below deck view of Plug/Cap in place with turn-buttons fore-n-aft:
 Below deck view of Plug/Cap in place with turn-buttons athwartship (no worries about that knot):
 This configuration works well - sitting still in the Boat Bay: the Plug/Cap just does not move when tightened down. But I expect it will work just as well on the water.
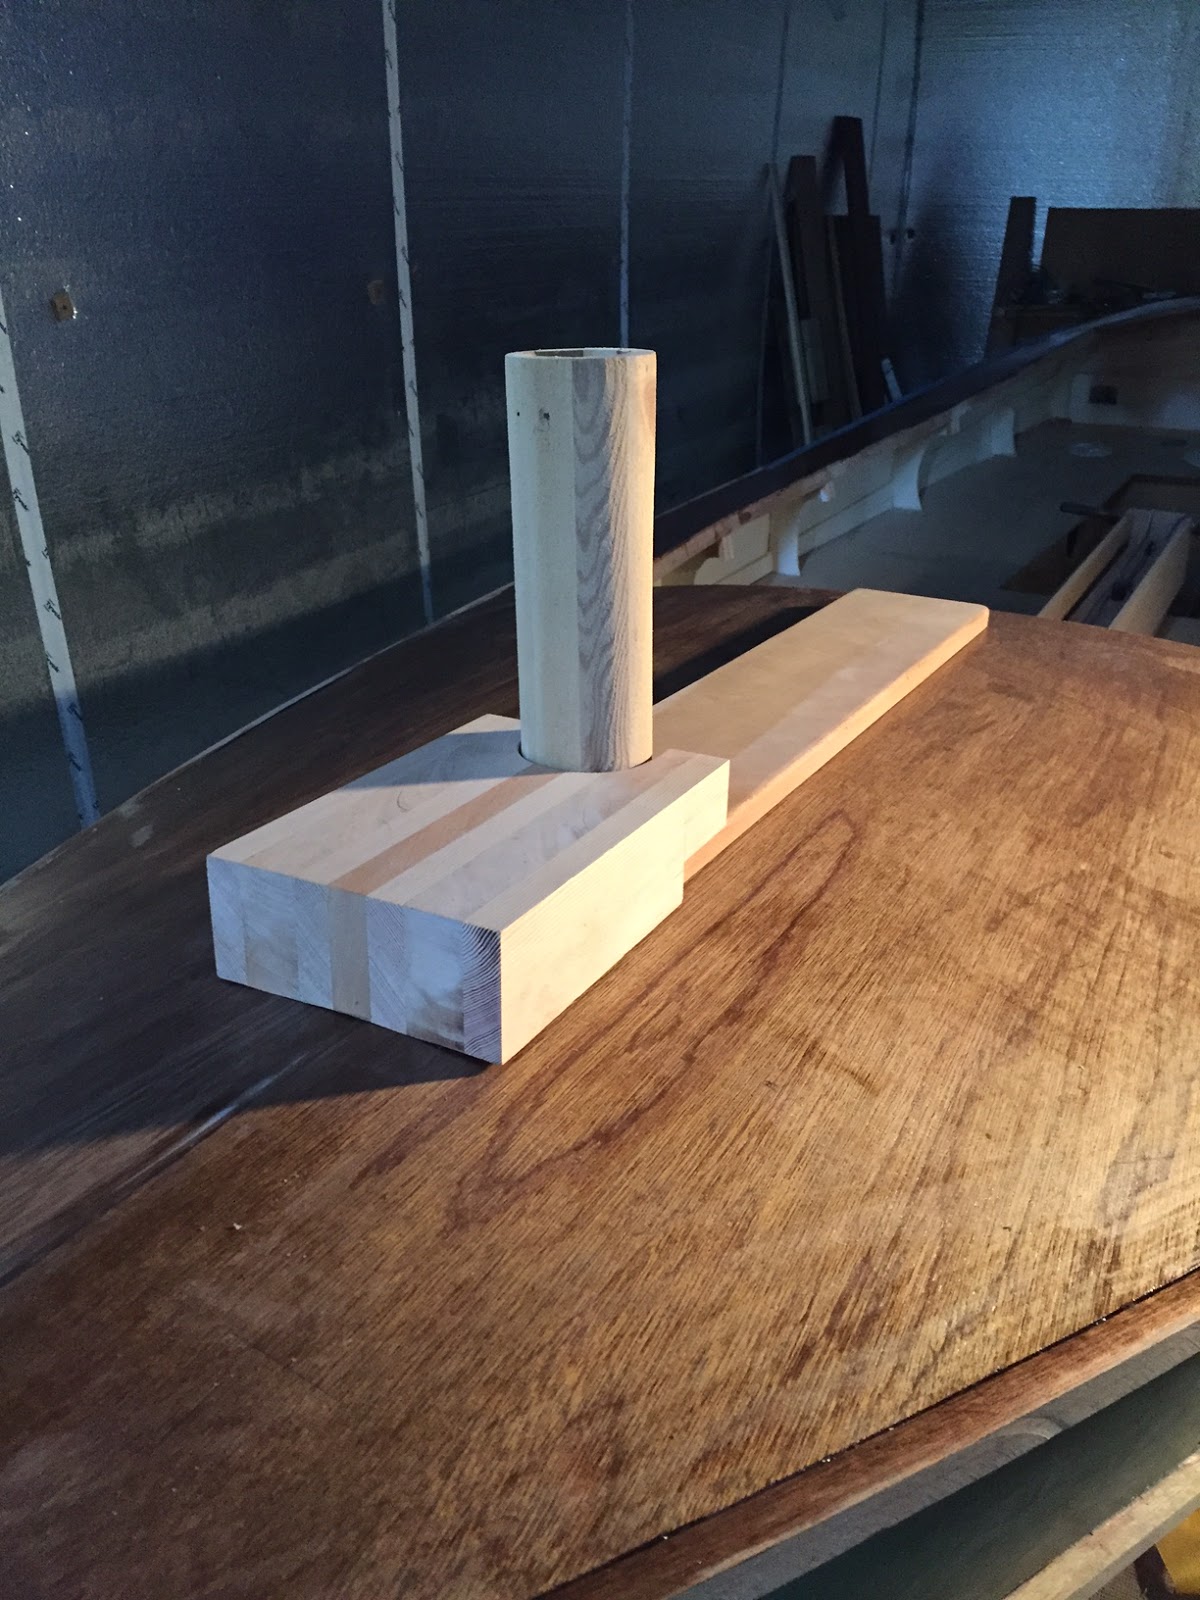
One more design element is, what i call, the Mast Block. My intent is for the block to help support the mast (although that may not be its primary purpose) and to provide an anchor point for the foreward ends of the cockpit coamings (probably its legitimate purpose) and the downhaul. It is a work in progress.
Slot:


One more design element is, what i call, the Mast Block. My intent is for the block to help support the mast (although that may not be its primary purpose) and to provide an anchor point for the foreward ends of the cockpit coamings (probably its legitimate purpose) and the downhaul. It is a work in progress.
Sunday, October 29, 2017
Deck Epoxy, Mizzenmast Varnish, and the Slot Cap
The top deck has received two coats of epoxy.
 Having shaped and sanded the mizzenmast, I've begun varnishing it. Using wiping varnish (50/50 varnish/mineral spirits) for starters, I will eventually progress to un-thinned varnish.
 The Slot Cap is a late development of the mast raising system (a slot in the fore deck and king plank to facilitate raising the mast) I've installed. The plug, which fits the slot, has been glued to the cap (which prevents the assembly from falling through the slot). Turn buttons on the bottom of the plug prevent the plug from popping out of the slot. I'll take photos of the assembly and how the turn buttons work.
 (Photos to follow...)


Sunday, October 22, 2017
Mizzenmast, Trailer and Seams
Planing the square mizzenmast blank to an octagon took nearly a full day last Tuesday. Planing it to 16 sides took about 40 minutes; and to 32 sides took about 25 minutes on Thursday. Sanding to round, using 50, 60, 80 and 120 grit, took about an hour on Friday. Cutting the tenon to fit the mast step took most of Friday afternoon.


I re-installed the bunks on the trailer so that is ready for Gardens.
The deck seams have been filled and faired.
With the port side foredeck panel installed (and clamps removed!), Gardens looks more like a complete boat!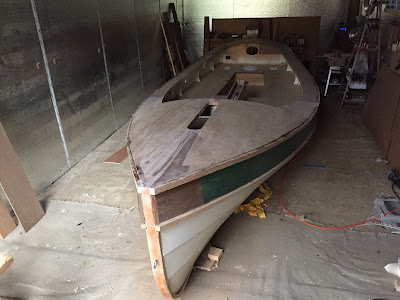


I re-installed the bunks on the trailer so that is ready for Gardens.
The deck seams have been filled and faired.
With the port side foredeck panel installed (and clamps removed!), Gardens looks more like a complete boat!

Wednesday, October 18, 2017
On a roll…
The installation of the starboard foredeck panel "took," (wasn't highly confident that would be the case Sunday evening).

(Monday) Spent an hour at the Michigan Secretary of State office to title and register Gardens. The first 20 minutes were spent waiting for my turn. Ten minutes with the clerk while she helped me get the correct information in the correct form, another 15 minutes while she copied the receipts I brought with me, five minutes waiting for the computer and, at the last ten minutes to finalize the forms and write the check. Gardens is 'official'! It was an hour well spent!

(Tuesday) Marked off the mizzenmast for shaping and planed the corners off the square blank taking it to an octagon. Using hand planes to shape wood is one of life's simple pleasures. Lots of shavings. I should do it more often…


(Wednesday) Installed the port foredeck panel without incident (had some help: an extra pair of hands made the task much easier than Sunday's solo installation).

I'm wondering if there is a tradition - similar to the whiskey plank tradition - for this point in building a boat… If not, perhaps our cold bear toast to Gardens this afternoon could be the start of a new tradition… hmmm, perhaps not (I'm guessing I'm not the first to enjoy a beer after the "last major piece" is installed.) At any rate, we enjoyed the cold beer!
Subscribe to:
Posts (Atom)