Those first two partial planks were easy, even if I didn't think so at the time. The second pieces were easier - and I lulled myself into believing planking the boat would be an easy, simple and even pleasant experience.
The third piece - the forward eight feet of the lowest plank is very difficult. The plywood has to bend and twist in at least two dimensions simultaneously - and it doesn't want to do what I want it to do.
So, the short version is: a) the foreward pieces of the lowest plank have been cut out and partially fitted; b) the plywood doesn't cooperate (as if it were making a conscious choice…); and c) I ran out of time last night. Those foreword pieces have not been glued into place.
The first partial planks were easy.
Saturday, September 29, 2012
Wednesday, September 26, 2012
Planking - It Really Does Get Easier!
Today I installed the second piece (of 3) on both of the lowest planks. It really does get easier.
Using a narrow piece of luan, dividers, a pencil and a straight edge, I marked off the plank. Then I transferred the marks to the planking material (9mm meranti plywood):

The plank was cut out and fitted (and refitted numerous times) to the frames & stringers on the starboard side. When I was happy with the fit, I flipped the plank over and clamped it in place on the port side. It was very satisfying to see it fit just right! So, using that piece as a pattern, I traced and cut out the second piece of lowest plank for the port side.
After lunch we - I had help - installed both pieces. I'm quite pleased with the results.

Tomorrow I plan to mark off, line off, cut, fit and install the last two pieces to complete the two lowest planks. These may be tricky as the ply bends and twists in two (or is it three?) dimensions but others have done it so I know it is doable.
Today's work was easier than those first two partial planks earlier in the week.
Tuesday, September 25, 2012
Casting Lead - An Experiment
As noted a couple of days ago, I bought enough lead for the CB weight and a spar measuring weight (10kg weight used to measure the stiffness of yards and booms). Doryman suggested making a lead-line - which is an excellent idea for a small boat intended for exploring unknown (to me) areas.
I found a website describing how one guy made a lead-line. He wrapped a shape with aluminum foil, supported the shape with sand inside a can, removed the solid shape, melted and poured lead. That's the short version. Here's the link to his post:
http://www.jonnymooresailing.co.uk/leadline
Using a small (1.5" diameter plastic bottle about 6" tall) bottle for the shape, I wrapped it in foil (double layer of heavy duty aluminum foil), set it in a large enough can, filled the can (around the shape) with sand and removed the plastic bottle to create my mold. So far so good…
The two-burner propane camp stove was set up outside and a used, heavy-duty pot (from Good Will) was large enough to hold one of the 13.5 lb. pigs of lead. So far so good…

And then things didn't go so well… An hour of heating did nothing… heck, the pig was barely warm to the touch… I turned off the stove to think about this…
Back at it, I relit the stove, turned the heat on Full-Blast HIGH… and waited… 20 minutes later - nothing. I cut a small chunk off another pig and put it in the pot - and watched it melt within seconds! I started thinking about cutting the pigs into small pieces to facilitate melting when I realized the lead in the pot was just about completely molten… 35 minutes of Full-Blast HIGH heat did the trick (why didn't I think of that sooner?).
After spooning a few bits and pieces of non-lead debris from the surface, I poured the lead into my mold. All went well… All I had to do was wait for the lead to cool which it eventually did… Pulling the mold from the sand and unwrapping (what I could) the foil left me with this:

It is an incredibly rough casting which weighs about 3 lb. It is about the right size but much too rough to work into a final, usable lead-line. The really nice characteristic of lead? It can be remelted and recast. I will work on my foil wrapping and mold making.
It is fun experimenting like this with a simple project (easy shape and not too much lead involved) to learn what I need to learn to cast the CB and spar weights - and a lead-line).
Sunday, September 23, 2012
Planking - The Easy Ones (Updated with photos)
According to the written instructions accompanying the Pathfinder plans, the first two partial planks are "the easy ones." If that's the case, I may be in for a long-term project planking the boat. These planks have not been particularly easy for me. Now, a huge part of that is the learning curve - figuring out the process: bevels on the stringers and planks. Also, figuring out the apparent discrepancies between the drawings and the written instructions was interesting.
On the other hand, I think their short length may be what makes these the "easy planks." Subsequent planking should actually become easier to fit despite their longer lengths. Of course the "easy ones" characterization just may be John Welsford's sense of humor shining through.
Here is Gardens ready for planking…

Port side:


Starboard side:


At any rate, the first two pieces of planking have been fitted. I have set myself a goal: complete the first plank on both sides before I leave for Sail OK on October 2nd. That should be doable but I lose a half-day this Tuesday with some volunteer work. Saturday's visit to Ann Arbor will cost at least one full day and I'll need at least one full day to make sure Karen Ann is ready for Sail OK. I will have to plug away at completing those first two full planks in order to meet my goal.
But, the important thing for me is this: Those first two partial planks - the "easy ones" - are on the boat. I am over that hurdle.
Thursday, September 20, 2012
Idling Along...
Inventory management around here needs some improvement! I ran out of colloidal silica before the new supply could arrive. So, actual work on Gardens has been in an idling mode for a day or two.
In the meantime, I picked up 9 sheets of meranti plywood (9mm and 6mm) at L.L. Johnson Lumber in Charlotte, MI. The ply is for planking, bunk-flats, seats, decking and more. Charlotte is an easy one hour drive from here through the countryside and farmlands of Central Michigan and it was pleasant to see the changes late summer brings to the landscape. I tidied up the shop in general and the workbench in particular. Then there are a few stray projects needed to get the Goat Island Skiff ready for Sail OK. So, I've been busy but made little progress on Gardens so far this week. (I'm ignoring any number of tasks I could be working on for Gardens: shaping the CB, cast the CB counterweight, shape the rudder and other such items.)
The new supplies arrived late this afternoon - and the recently ordered angle grinder will be here tomorrow.
It is time to begin planking Gardens' hull!
Monday, September 17, 2012
Lead for the Centerboard
Last week I found a great local source for lead. The wooden centerboard needs 45 pounds, or so, of lead to prevent it from floating up into its case. I have been reading about casting lead on various threads on different forums for some time now and the one common issue in all the threads is where to obtain lead. Several months ago I asked several local tire shops (a frequently cited source for lead) about wheel weights. All of the shops I spoke with either re-use their wheel weights or take them to a recycler. The ones that recycle them were not interested in saving any weights for me. So, I was concerned about where to obtain lead.
Buying 45 pounds of lead at the retail level did not seem cost effective to me. Down-rigger weights, scuba weights, lead shot, sinkers - all proved to be too pricey for me.
Three different people, when asked, suggested Greenville Steel. Okay, I've seen their shop on Michigan 91 but it doesn't look like it would have lead… (yeah, an assumption): Steel is in their name; their sign mentions steel fabricating and their building looks very neat and tidy - almost pristine. When I asked in the office if they handle lead, the woman at the counter asked me how much I was bringing in? No, I want to buy some. She seemed amused that any one would want to buy lead…
Looks are deceiving. Greenville Steel is a "recycler" (what used to be called a "scrap yard" and before that a "junk yard"). The yard out back behind the pristine building and tall white fence is full of stuff - including lots of lead. The bin of clean lead must hold several tons of the stuff and the bin with dirty lead was larger. Actually, the guy in the yard was more than amused that I wanted to buy lead. Not sure why that strikes anyone as funny but it does.
These five pigs of clean lead weigh a total of 67 pounds and cost me $30.00. I was pleased with the price (less than $.45/lb.) and that I found a source for lead.

I'll melt some of the lead to cast the weight for the centerboard. The rest will be cast into a 10kg weight to be used to measure the bend in the spars for my balance lug sails.
Friday, September 14, 2012
All eight stringers have been fitted and gluing has begun.

(Note: not all stringers were fitted to the transom in the photo. All stringers have since been fitted bow to stern.)
The sheer stringers fit much better (no bump in the sheer line and no excessive force needed to fit the stringers in place) after the notches in Frame #2 were cut down to remedy my measuring error on that frame. I'll fair the top of the frame before installing the deck.
Wednesday, September 12, 2012
Measure Twice - Cut Once
Measure Twice (or more) - Cut Once (or make repairs later)
Here is part of the double "S" curve in the sheer line when I forced the top stringer into place (sort of):
Swooping up from F3 to F2:

Swooping down from F2 to F1:

It swoops up from F1 to the stem. (but no photo)
It was a struggle to force the stringer into place - lots of twisting, lifting pulling, pushing... And, the stringer does not sit well in the notches of Frames 1, 2 and 3.
This afternoon while continuing the effort to force the starboard stringer into place I unscrewed it from Frame 2... I pulled the stringer from the notch and tried to fit it to its notch in Frame 1 and then on to the stem. Like magic, it fit - perfectly: a nice, smooth and fair swoop right up to the stem.

Of course, the stringer was NOT in its notch in Frame 2:

It is a full 40mm lower than the notch - way too much to cut away. What did I do wrong? Checking the plans against the frame as built, everything seemed to match. Then I took another look and found the 40mm! The dimension from the W/L to the top outer corner of the frame is 590mm, right? NO! That dimension is 550mm but it is smudged, smeared or otherwise not entirely clear on my drawing. I decided to ask another pair of eyes to look at the plans to verify what I found. Under bright light, the dimension was read as 550mm - but my friend agreed that it could easily be read as 590mm.
Great! I now know I have to take 40mm out of Frame 2. What I don't know is whether the top of the frame is correct (711mm above W/L) or not. I'll check that in the morning before deciding where and how to remove those extra 40mm.
Monday, September 10, 2012
Stringers are Strung... sort of...
Six of the eight stringers have been installed and, from what I can tell, those six (the lower three on each side) are fair and symmetrical from side to side. The last two - at the sheer - are giving me some fits.
However, slowly but surely, I am working on getting those last two stringers fair and symmetrical as well. The issue, for me, is that the notches in Frame 2 seem to be too high - high enough to create a 'bump' in the sheer at that frame.
 Double and triple checking the frame against the plans, it appears to be correct and the bump shows on both sides so I suspect I erred somewhere along the line. There is a solution. I am enlarging the notches bit by bit to eliminate the bump but it is slow going. I expect I will need to fair the top of Frame 2 so it meets the stringer at the sheer.
Further expectation is to complete the stringers tomorrow and begin planking by week's end. (Why is it expectations never seem to be met?)
However, slowly but surely, I am working on getting those last two stringers fair and symmetrical as well. The issue, for me, is that the notches in Frame 2 seem to be too high - high enough to create a 'bump' in the sheer at that frame.

Further expectation is to complete the stringers tomorrow and begin planking by week's end. (Why is it expectations never seem to be met?)
Saturday, September 1, 2012
A Rainy Night In Georgia
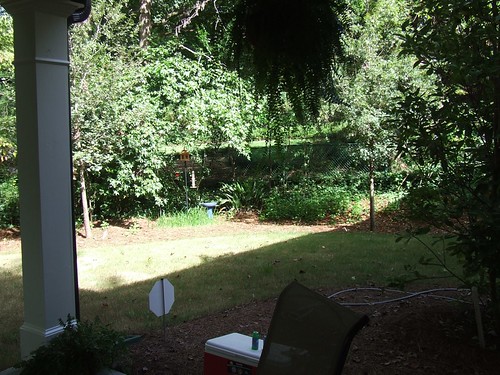
Okay, so it isn't raining and it isn't nighttime but I am in Georgia for the Labor Day weekend.
While working on the stringers last week, I realized certain supplies are running low. It is time to order more epoxy resin and hardener, silicon bronze fasteners, disposables (gloves, stir cups, stir sticks, etc.) and, at long last, the plywood for planking the hull! Ordering on-line is such a convenience - order from anywhere and a brown truck or a white truck or the letter carrier will deliver them to my door in Fenwick. Nice. Today's "anywhere" is a back porch in Atlanta.
Knowing the new supplies will be waiting for me when I return from the weekend is a good feeling. I'll pick up the plywood from L.L. Johnson in Charlotte, MI http://www.theworkbench.com/ next week after I've unpacked from this outing and put the new supplies away.
Stray fun thought of the day… Perhaps this image could be the inspiration for a logo for Gardens or, perhaps, for the workshop in Fenwick:

Maybe it will rain tonight...
While working on the stringers last week, I realized certain supplies are running low. It is time to order more epoxy resin and hardener, silicon bronze fasteners, disposables (gloves, stir cups, stir sticks, etc.) and, at long last, the plywood for planking the hull! Ordering on-line is such a convenience - order from anywhere and a brown truck or a white truck or the letter carrier will deliver them to my door in Fenwick. Nice. Today's "anywhere" is a back porch in Atlanta.
Knowing the new supplies will be waiting for me when I return from the weekend is a good feeling. I'll pick up the plywood from L.L. Johnson in Charlotte, MI http://www.theworkbench.com/ next week after I've unpacked from this outing and put the new supplies away.
Stray fun thought of the day… Perhaps this image could be the inspiration for a logo for Gardens or, perhaps, for the workshop in Fenwick:
Maybe it will rain tonight...
Subscribe to:
Posts (Atom)